Meshy for ZBrush
Install the Meshy plugin in ZBrush so you can send models from the Meshy web app to ZBrush and use them as a starting point for your sculpt.
Before you begin
-
You need ZBrush 2025.1 or later. The plugin uses the ZBrush Python API, which earlier versions don't have.
-
You need macOS or Windows. Each download includes its own Python runtime, so you don't need to install Python.
-
You need a Meshy account. To send models with the bridge, you need a Pro plan or higher.
Install the plugin
To install the plugin, follow these steps:
-
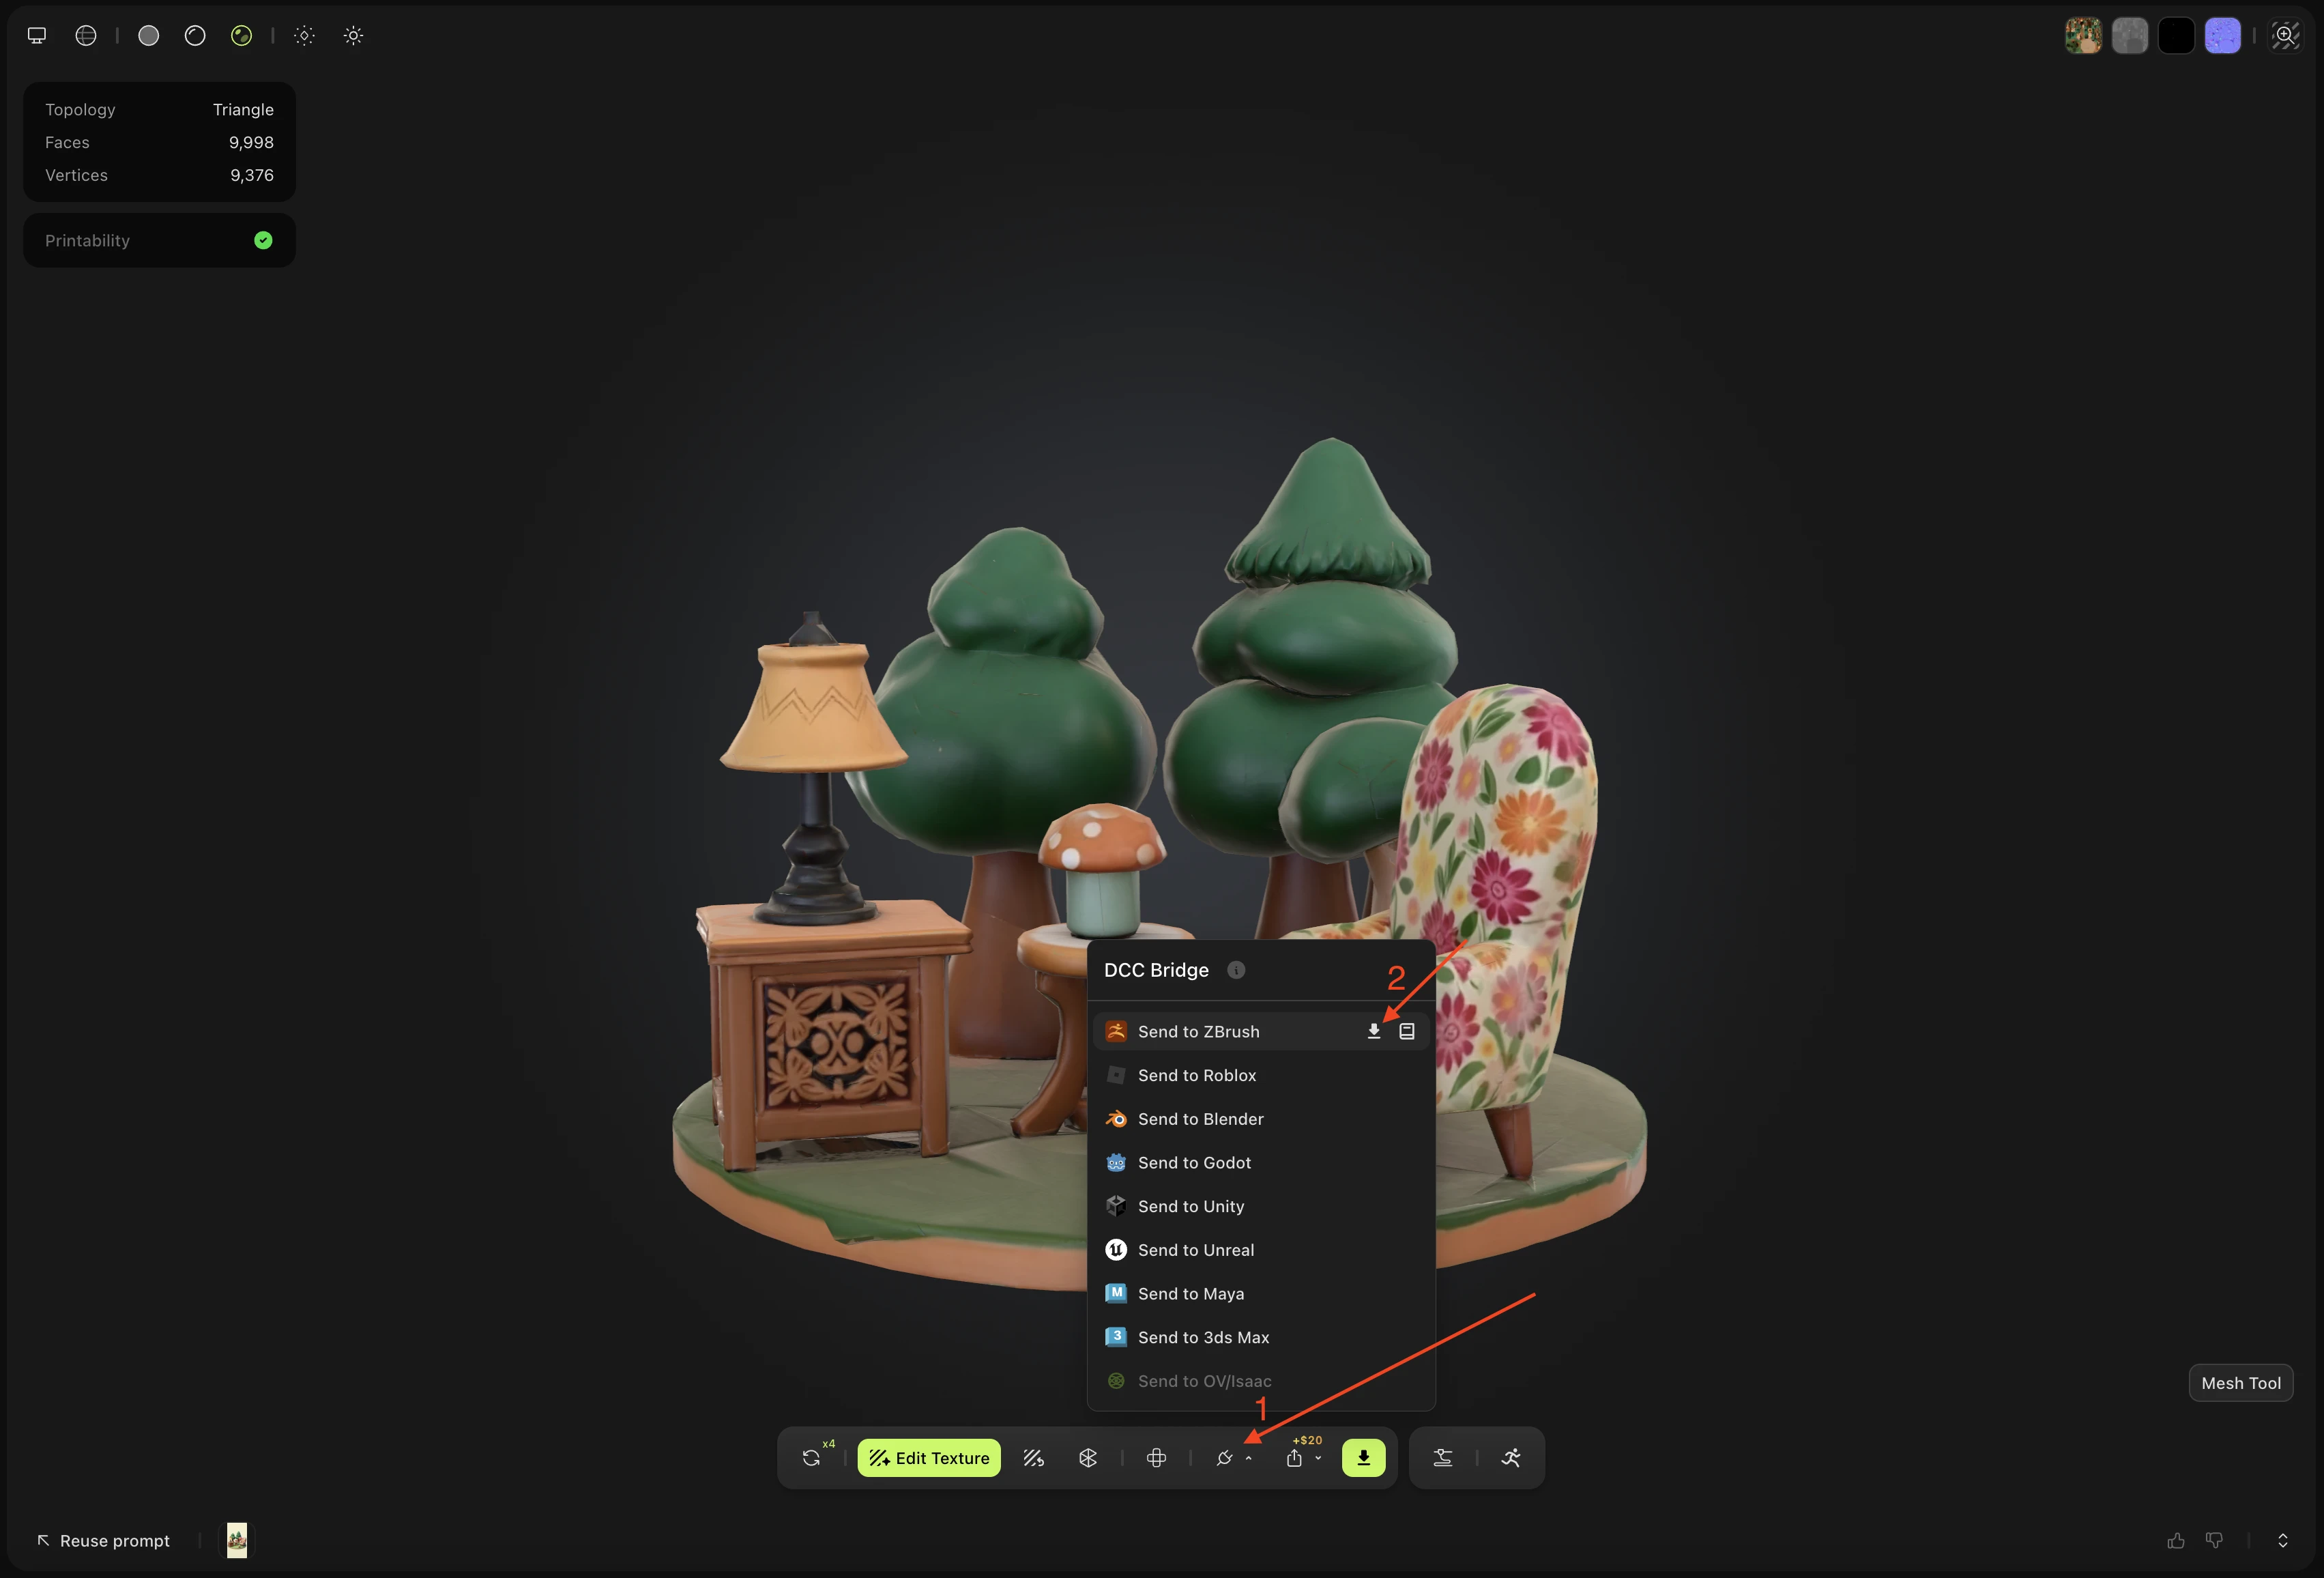
In the Meshy web app, open a model that isn't animated, and then in the viewer toolbar, click DCC Bridge (the plug icon). For an animated model, Send to ZBrush shows no download icon.
-
Hold the pointer over Send to ZBrush, and then click Download Plugin (the download icon). The Meshy for ZBrush integration page opens.
-
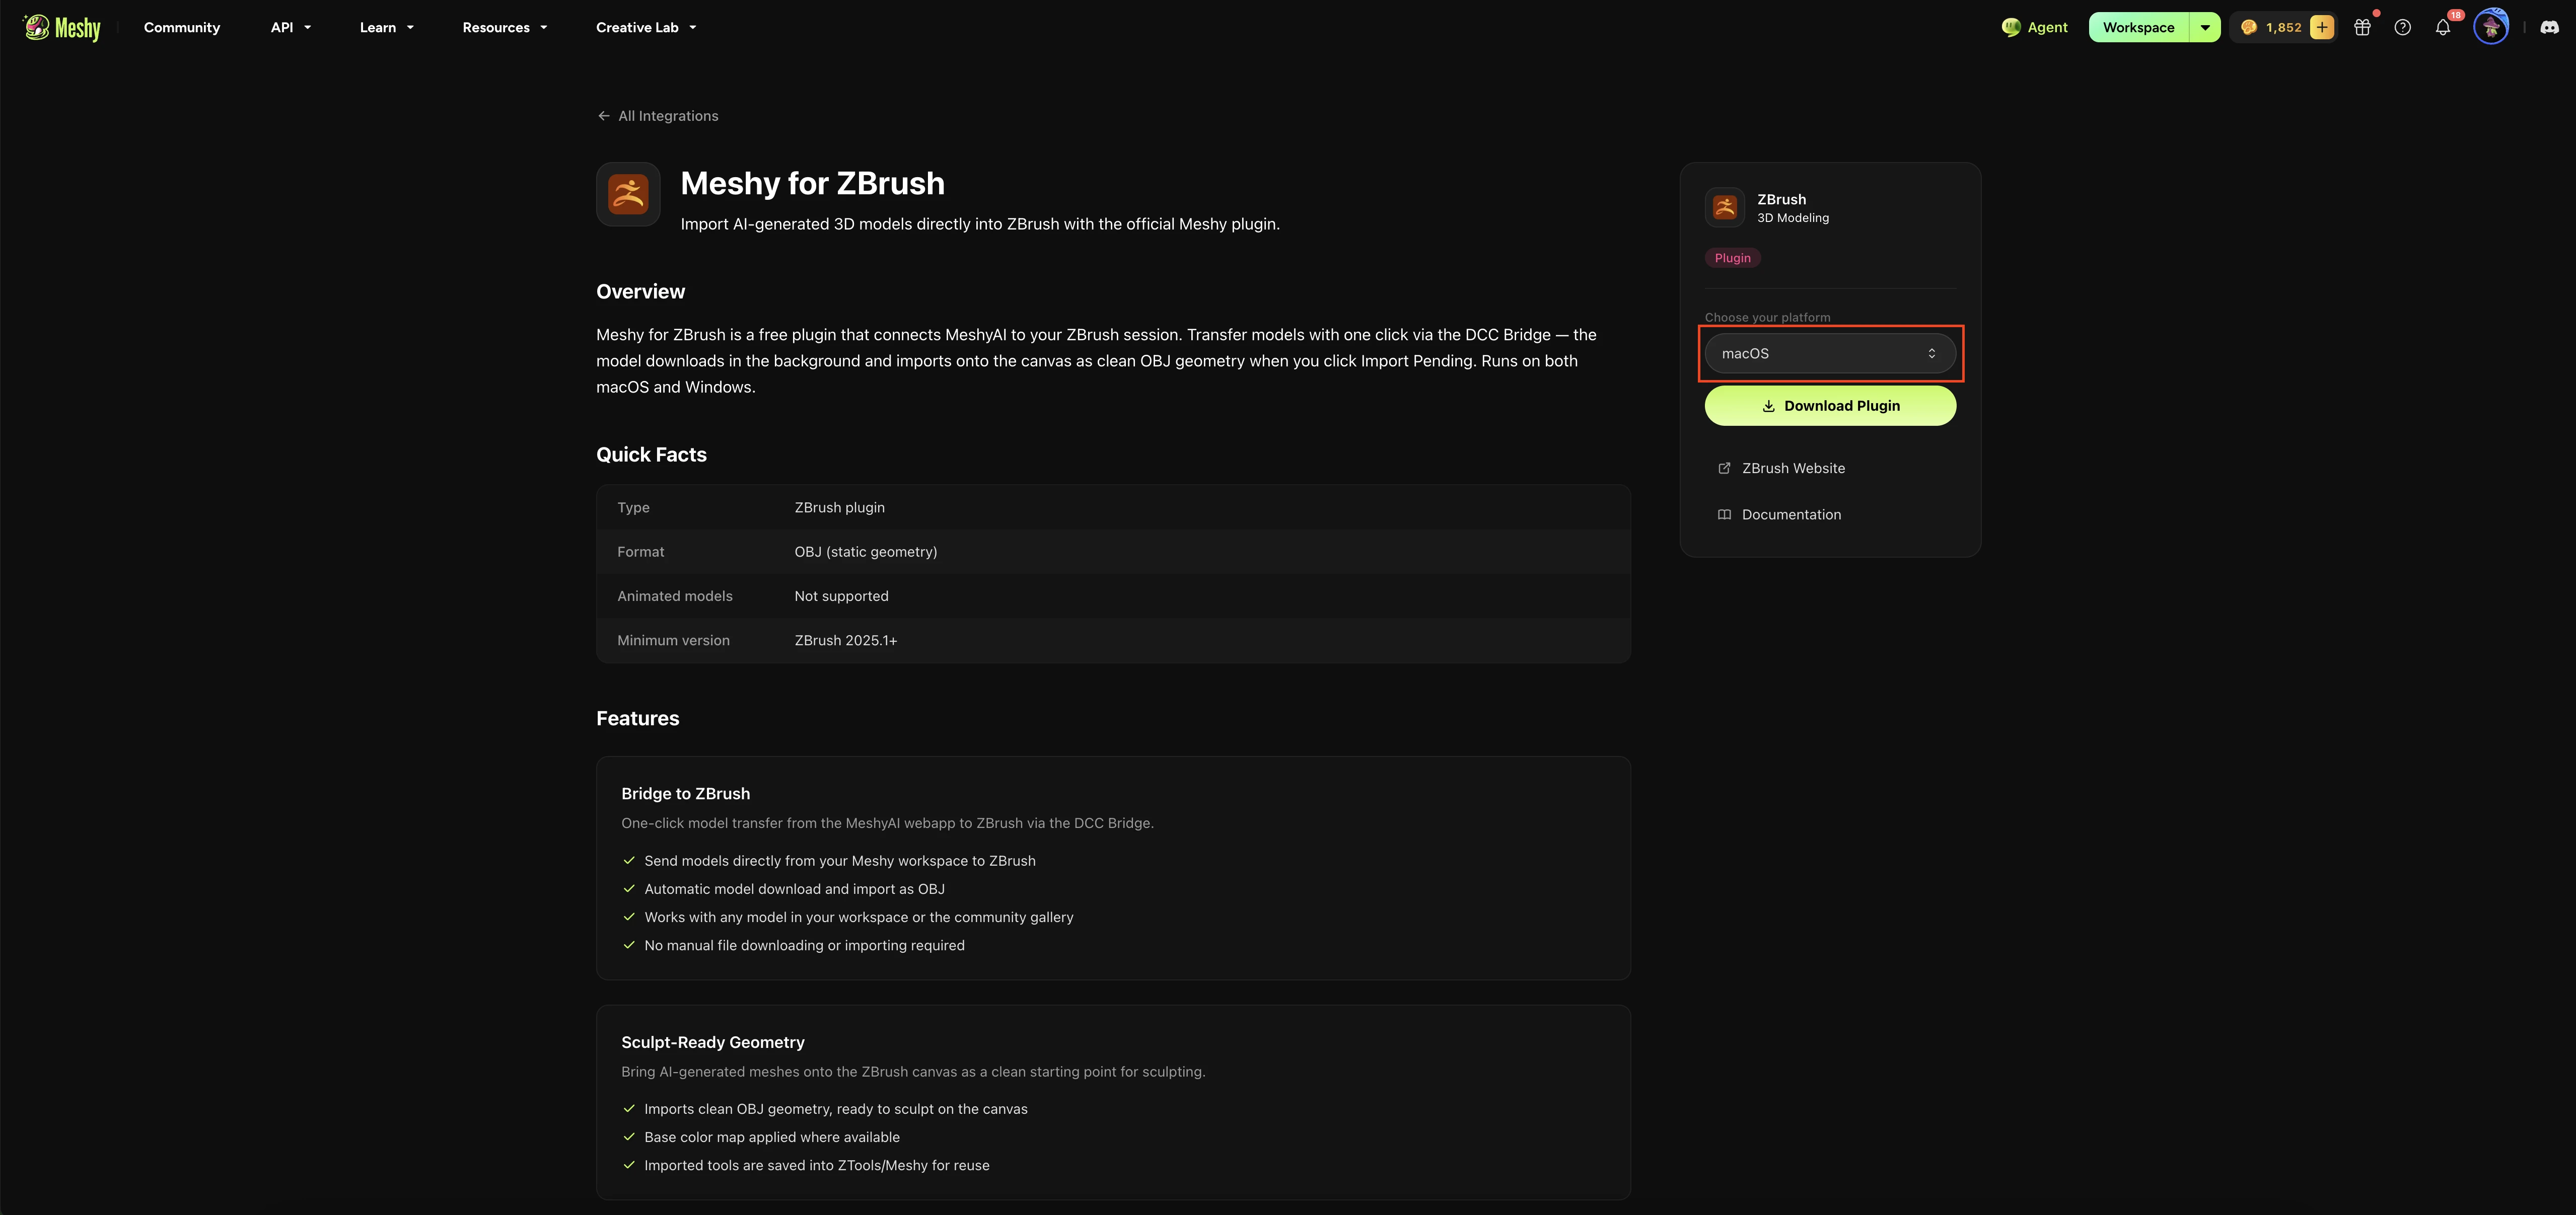
Under Choose your platform, select macOS or Windows, and then click Download Plugin.
-
Open the download. On macOS, open the
.dmgfile. On Windows, extract the.zipfile. -
Copy
MeshyBridge.zscand theMeshyBridgeDatafolder into theZData/ZPlugs64folder of your ZBrush installation. For example:- macOS:
/Applications/Maxon ZBrush 2026/ZData/ZPlugs64 - Windows:
C:\Program Files\Maxon ZBrush 2026\ZData\ZPlugs64

- macOS:
-
On macOS only, clear the quarantine flag on the
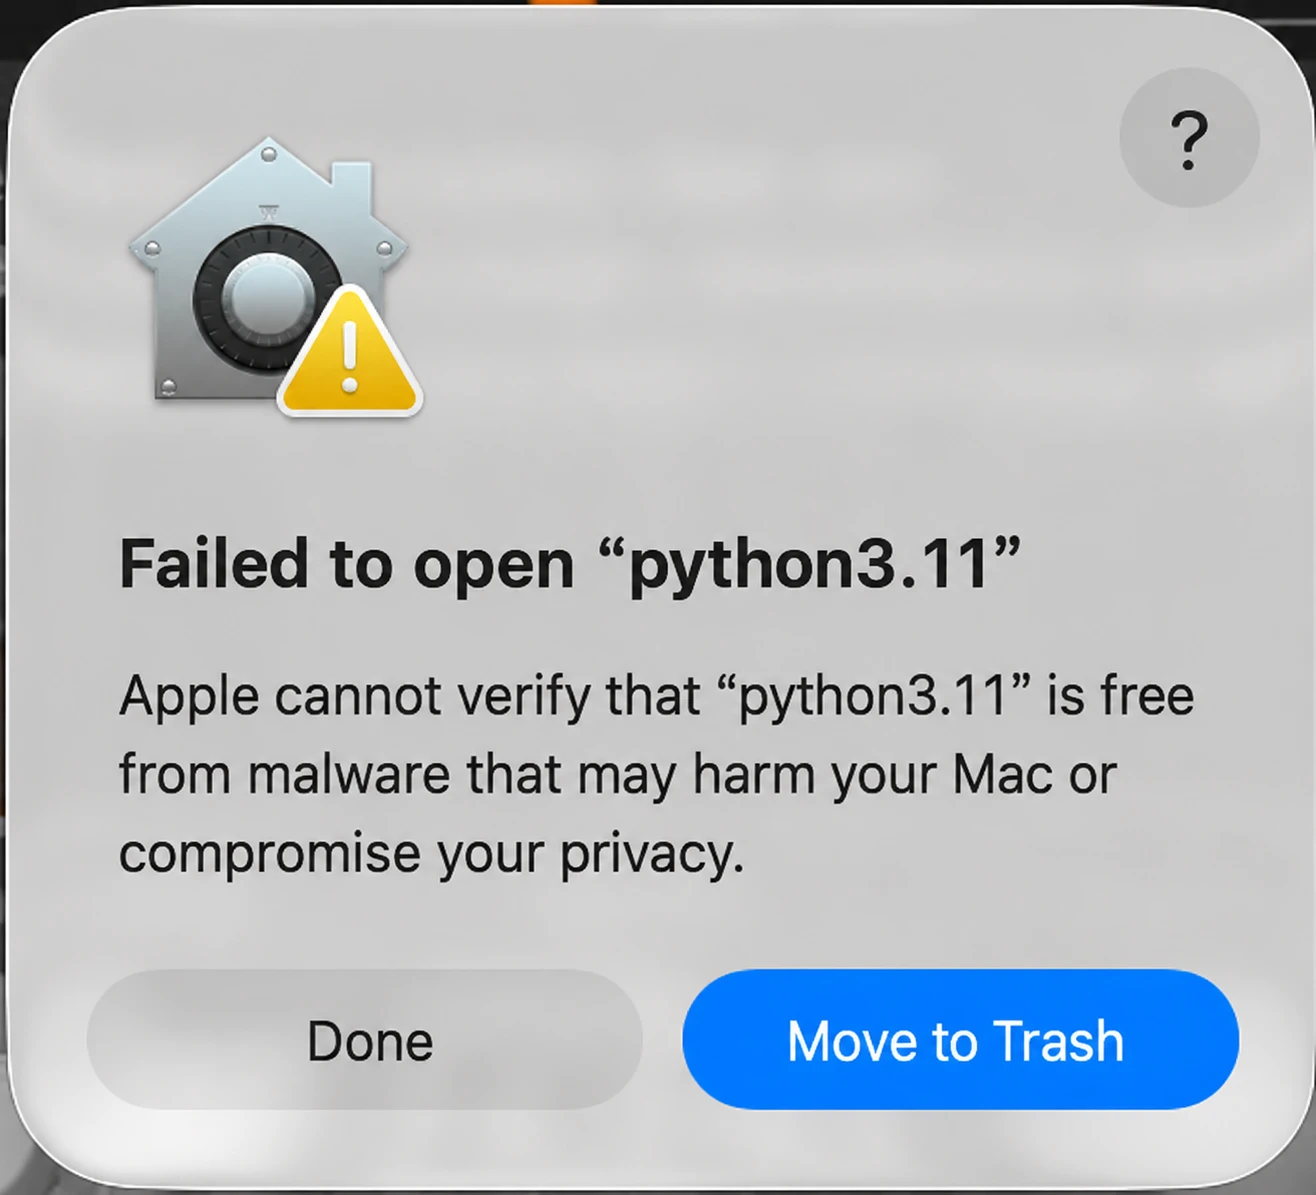
MeshyBridgeDatafolder, so ZBrush can start the Python runtime that comes with the plugin. macOS quarantines the runtime because the build isn't notarized. In Terminal, run the following command once:xattr -dr com.apple.quarantine "/Applications/Maxon ZBrush 2026/ZData/ZPlugs64/MeshyBridgeData"If you skip this step, macOS blocks the Python runtime and shows an error like the following:
-
Restart ZBrush.
-
Click Zplugin > Meshy Bridge > Load Meshy Bridge.
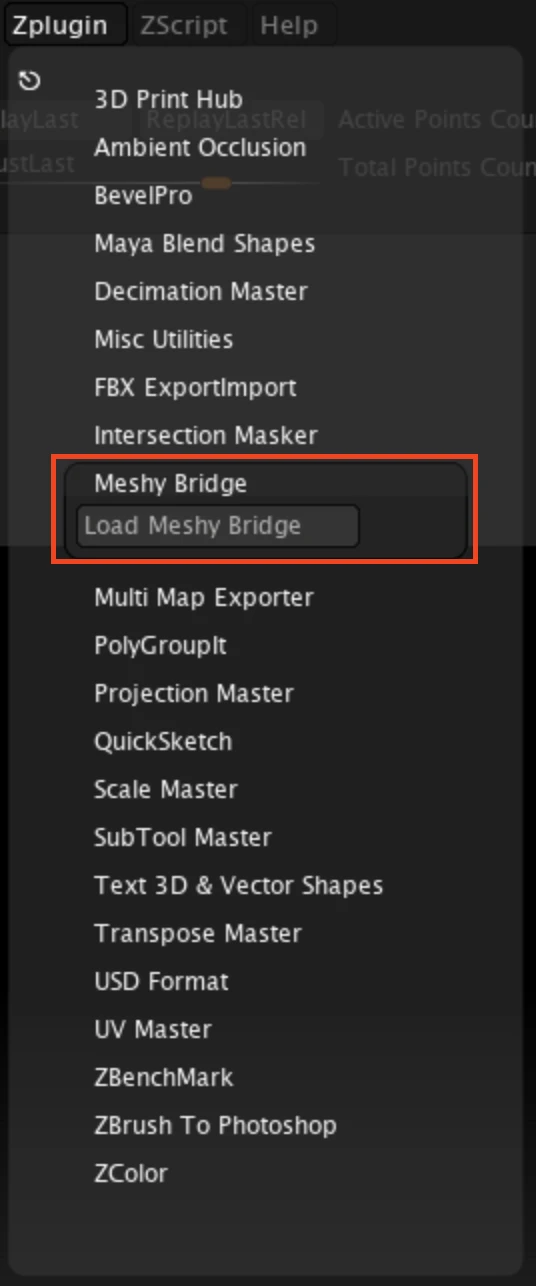
After a few seconds, a Meshy menu appears in the ZBrush menu bar. It holds all the bridge controls.
Next steps
- To send your first model from Meshy to ZBrush, see Bridge to ZBrush.