Meshy for Roblox
This is the official documentation of Meshy Roblox Bridge, you'll find detailed instructions on how to send Meshy-generated 3D models to your Roblox account and use them in Roblox Studio.
In this guide, we will walk you through how to efficiently use this bridge. The documentation covers:
- Introduction – Learn about installation and requirements
- Bridge to Roblox – Learn how to send models from Meshy to Roblox with one click
Let's get started! 🚀
Prerequisite
Roblox in mainland China is operated by a regional partner with a separate account system and no Open Cloud API support. As a result, Meshy Roblox Bridge does not work with Roblox accounts in Mainland China (roblox.qq.com / roblox.cn).
To use the Bridge, you need:
- A network proxy / VPN to access
roblox.com. - A global Roblox account registered at roblox.com
Meshy Roblox Bridge enables seamless upload of MeshyAI-generated models to your Roblox account, where they appear in your Creator Hub inventory and can be used directly in Roblox Studio.
To use it, you need:
- A Meshy Pro account or above
- A Roblox account
- macOS or Windows (to run the Bridge app locally)
- The Meshy Roblox Bridge app downloaded and running on your computer
Installation
Step 1 — Download the Bridge
Download the Meshy Roblox Bridge app from its integration page.
Step 2 — Run the Bridge
Unzip the downloaded file and run the executable:
- macOS: Open
Meshy Roblox Bridge - Windows: Run
MeshyRobloxBridge.exe
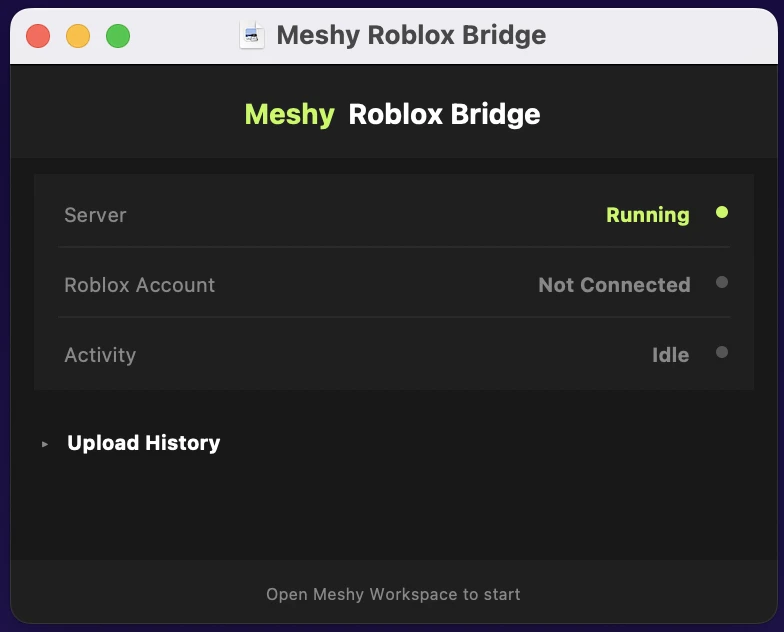
The Bridge starts a local server on port 5330. Keep it running in the background while you use Meshy.
The Bridge must be running before you can send models to Roblox. If you see a "Bridge not running" message in Meshy, make sure the app is open on your computer. Also ensure port 5330 is not blocked by your firewall.
macOS Gatekeeper
Since the Meshy Roblox Bridge is distributed outside the Mac App Store and may not be notarized by Apple, macOS Gatekeeper can block it from opening. If you see a warning like "MeshyRobloxBridge can't be opened because Apple cannot check it for malicious software", follow the steps below to allow it.
Option A — Allow via System Settings (recommended)
-
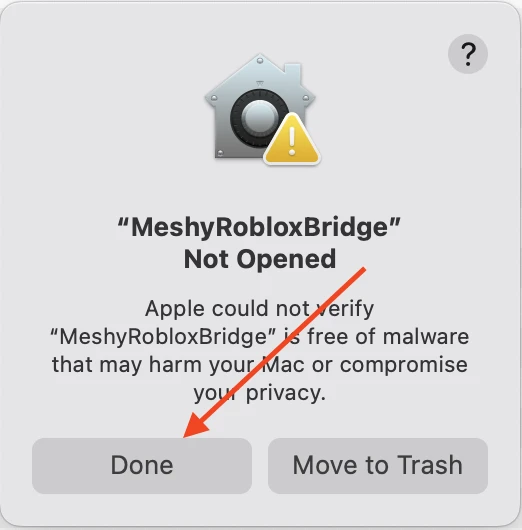
After the warning dialog appears, click Done to dismiss it.
-
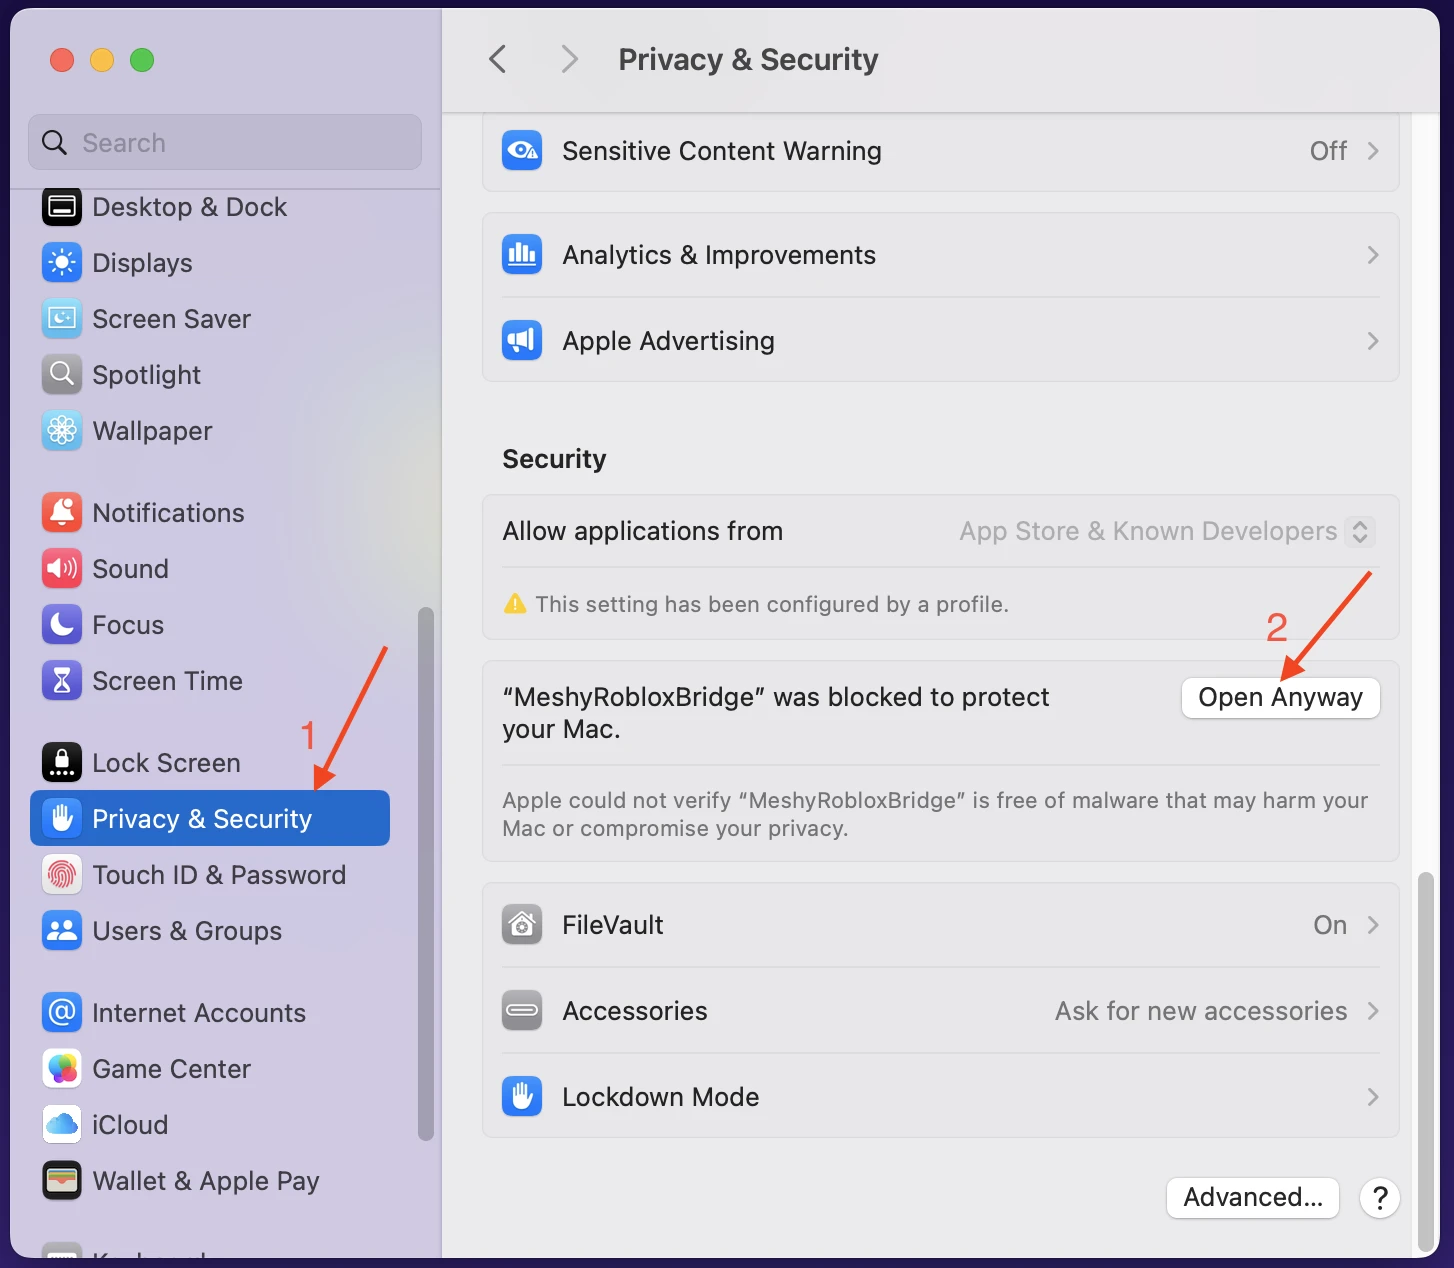
Open System Settings → Privacy & Security.
-
Scroll down to the Security section. You will see a message saying "MeshyRobloxBridge" was blocked from use because it is not from an identified developer.
-
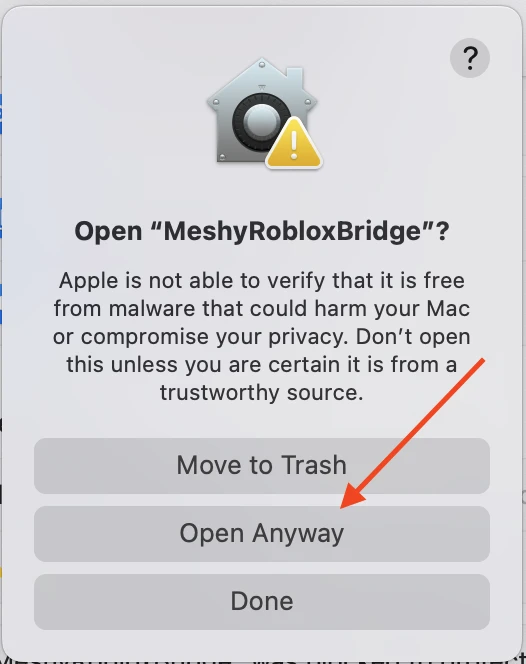
Click Open Anyway. A dialog will pop up asking you to select Open Anyway again to confirm.
-
macOS will then ask you to enter your Mac login password to authorize the action.
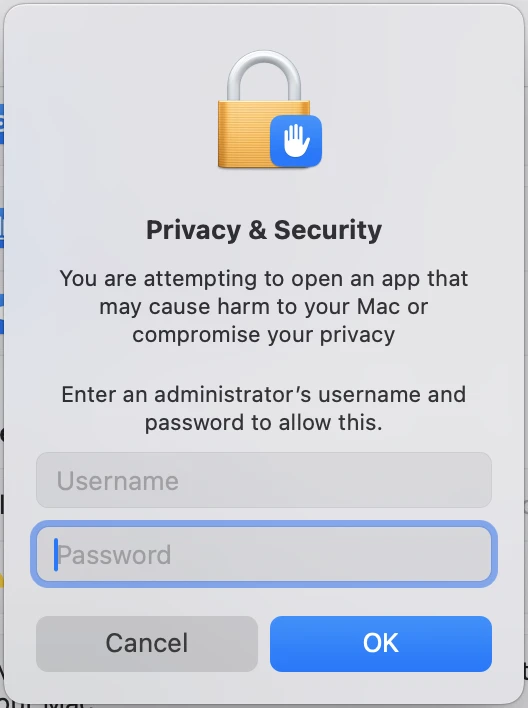
After entering your password, the Bridge will launch successfully. You should see the Bridge window showing Server: Running.
Option B — Allow via Terminal
If you prefer using the command line, open Terminal and run:
xattr -cr /path/to/MeshyRobloxBridge.app
Replace /path/to/MeshyRobloxBridge.app with the actual path to the app — for example, ~/Downloads/MeshyRobloxBridge.app. After running the command, double-click the app to open it normally.
This is a one-time step. Once you allow the app, macOS will remember your choice and you won't see the Gatekeeper warning again.
Plugin Features
- Bridge to Roblox — Send any Meshy model to your Roblox account in one click. The model is uploaded as a GLB asset and appears in your Creator Hub inventory, ready to use in Roblox Studio.