Model Export
The Export panel provides tools to export your models in various formats suitable for 3D printing, sharing, and further processing. Export your cleaned and prepared models with full control over format and options.
Before you begin, make sure you have downloaded and installed the Meshy for Blender plugin. For detailed instructions, please refer to the Introduction section.
Make sure your model is ready:
- Run Analyze checks to verify geometry
- Use Clean Up tools to fix issues
- Adjust size and orientation in the Edit panel
- Only then proceed to export
Supported Formats
The Export panel supports three common 3D file formats:
STL (Stereolithography)
Best for: 3D printing
- Most widely supported format for 3D printing
- Simple format containing only geometry (no colors, materials, or textures)
- Binary format is smaller and faster to process
- ASCII format is human-readable but larger
Use STL when:
- Exporting for 3D printing
- Sending to slicing software (Cura, PrusaSlicer, etc.)
- Maximum compatibility is needed
OBJ (Wavefront OBJ)
Best for: General 3D modeling and sharing
- Universal format supported by most 3D software
- Supports materials and textures
- Can include UV coordinates and normals
- Text-based format
Use OBJ when:
- Sharing models with others
- Importing into other 3D software
- You need material/texture information
PLY (Polygon File Format)
Best for: Models with vertex colors
- Supports vertex colors
- Can include UV coordinates and normals
- Good for scanned models with color data
- Binary or ASCII format
Use PLY when:
- Your model has vertex colors
- Working with scanned/photogrammetry data
- Color information is important
Export Settings
The Export panel provides all the settings you need to export your models:
Export Path
Set where to save the exported file:
- Relative Path: Use
//to save relative to the Blender file location - Absolute Path: Specify a full file path
- Default: If no path is set and the file isn't saved, exports go to your home directory
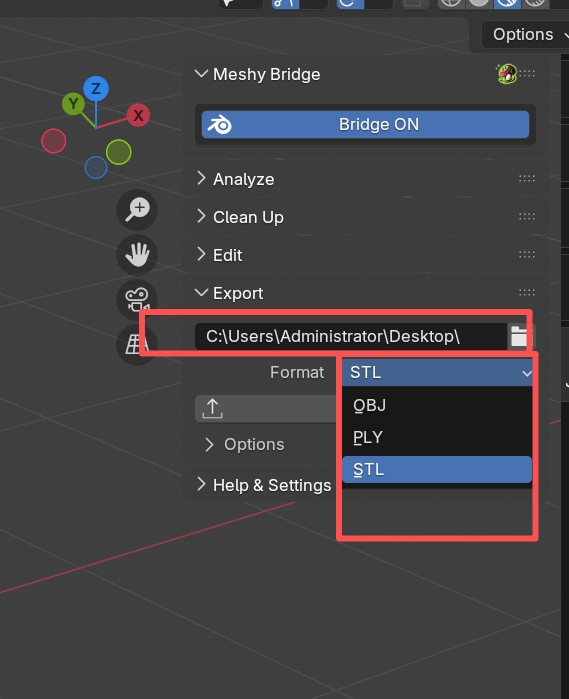
Format Selection
Choose your export format from the dropdown:
- STL
- OBJ
- PLY
The format determines which options are available.
Export Options
Expand the Options panel to access advanced settings:
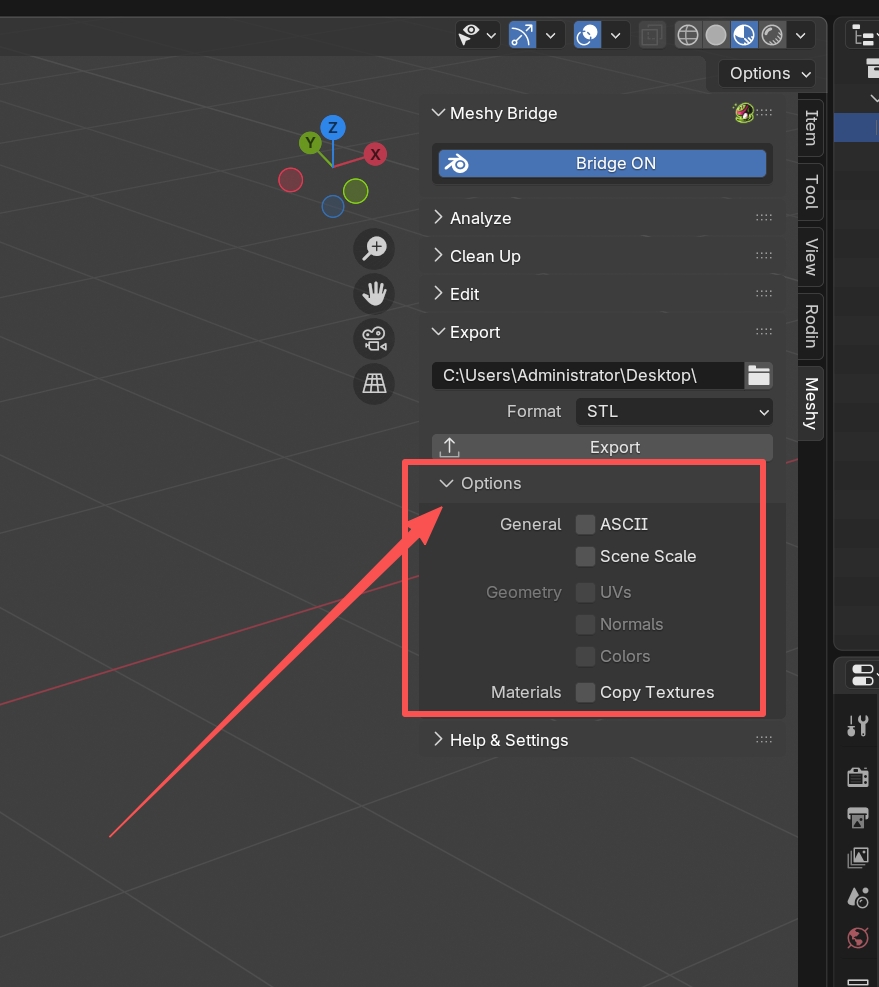
General Options
- ASCII Format: Save as text format instead of binary
- Available for STL and PLY formats
- Larger file size but human-readable
- Useful for debugging or manual editing
- Scene Scale: Apply Blender's unit scale to the export
- Ensures correct size in other software
- Important for accurate 3D printing
Geometry Options
Available for OBJ and PLY formats (STL only contains geometry):
- UVs: Export texture coordinates
- Required if you want to use textures in other software
- Preserves UV mapping information
- Normals: Export vertex normals
- Improves shading in other software
- Calculated if not explicitly set
- Colors: Export vertex color attributes
- Preserves color information from vertex colors
- Useful for scanned models with color data
Material Options
- Copy Textures: Copy texture image files to the export location
- Keeps textures with the exported model
- Useful when sharing models with textures
- Textures are copied to the same directory as the exported file
Export Workflow
Follow these steps for successful exports:
Step 1: Prepare Your Model
- Analyze: Run checks to identify issues
- Clean Up: Fix geometry problems
- Edit: Adjust size and orientation
- Verify: Run checks again to ensure everything is correct
Step 2: Configure Export
- Select Objects: Select the objects you want to export
- Choose Format: Select STL for 3D printing, OBJ/PLY for other uses
- Set Path: Choose where to save the file
- Adjust Options: Expand Options panel and configure as needed
Step 3: Export
- Click the Export button
- If the path wasn't set, a file browser will appear
- Choose the save location and filename
- The export will complete automatically
Step 4: Verify
- Check the export location for your file
- Import into your target software to verify
- For 3D printing, load into slicing software to check
For best 3D printing results:
- Format: Use STL format
- ASCII: Not necessary, binary is faster and smaller
- Scene Scale: Enable to ensure correct size
- Check Size: Verify dimensions in slicing software
- File Naming: Use descriptive names with version numbers
The export tool automatically generates filenames based on:
- Blender file name (if saved)
- Object name
- Format extension
Example: MyProject-MyModel.stl
You can change the filename in the file browser when exporting.