Model Editing
The Edit panel provides tools to modify and prepare your models for 3D printing. These tools help you optimize models for printing, adjust orientation, and control size.
Before you begin, make sure you have downloaded and installed the Meshy for Blender plugin. For detailed instructions, please refer to the Introduction section.
All editing operations can be undone using Blender's undo system (Ctrl+Z / Cmd+Z). Make sure to save your work before making significant changes.
Hollow
The Hollow tool creates an offset surface, making a solid model hollow. This is useful for:
-
Reducing material usage in 3D printing
-
Creating shells for casting
-
Making models lighter
-
Creating containers or vases
Parameters
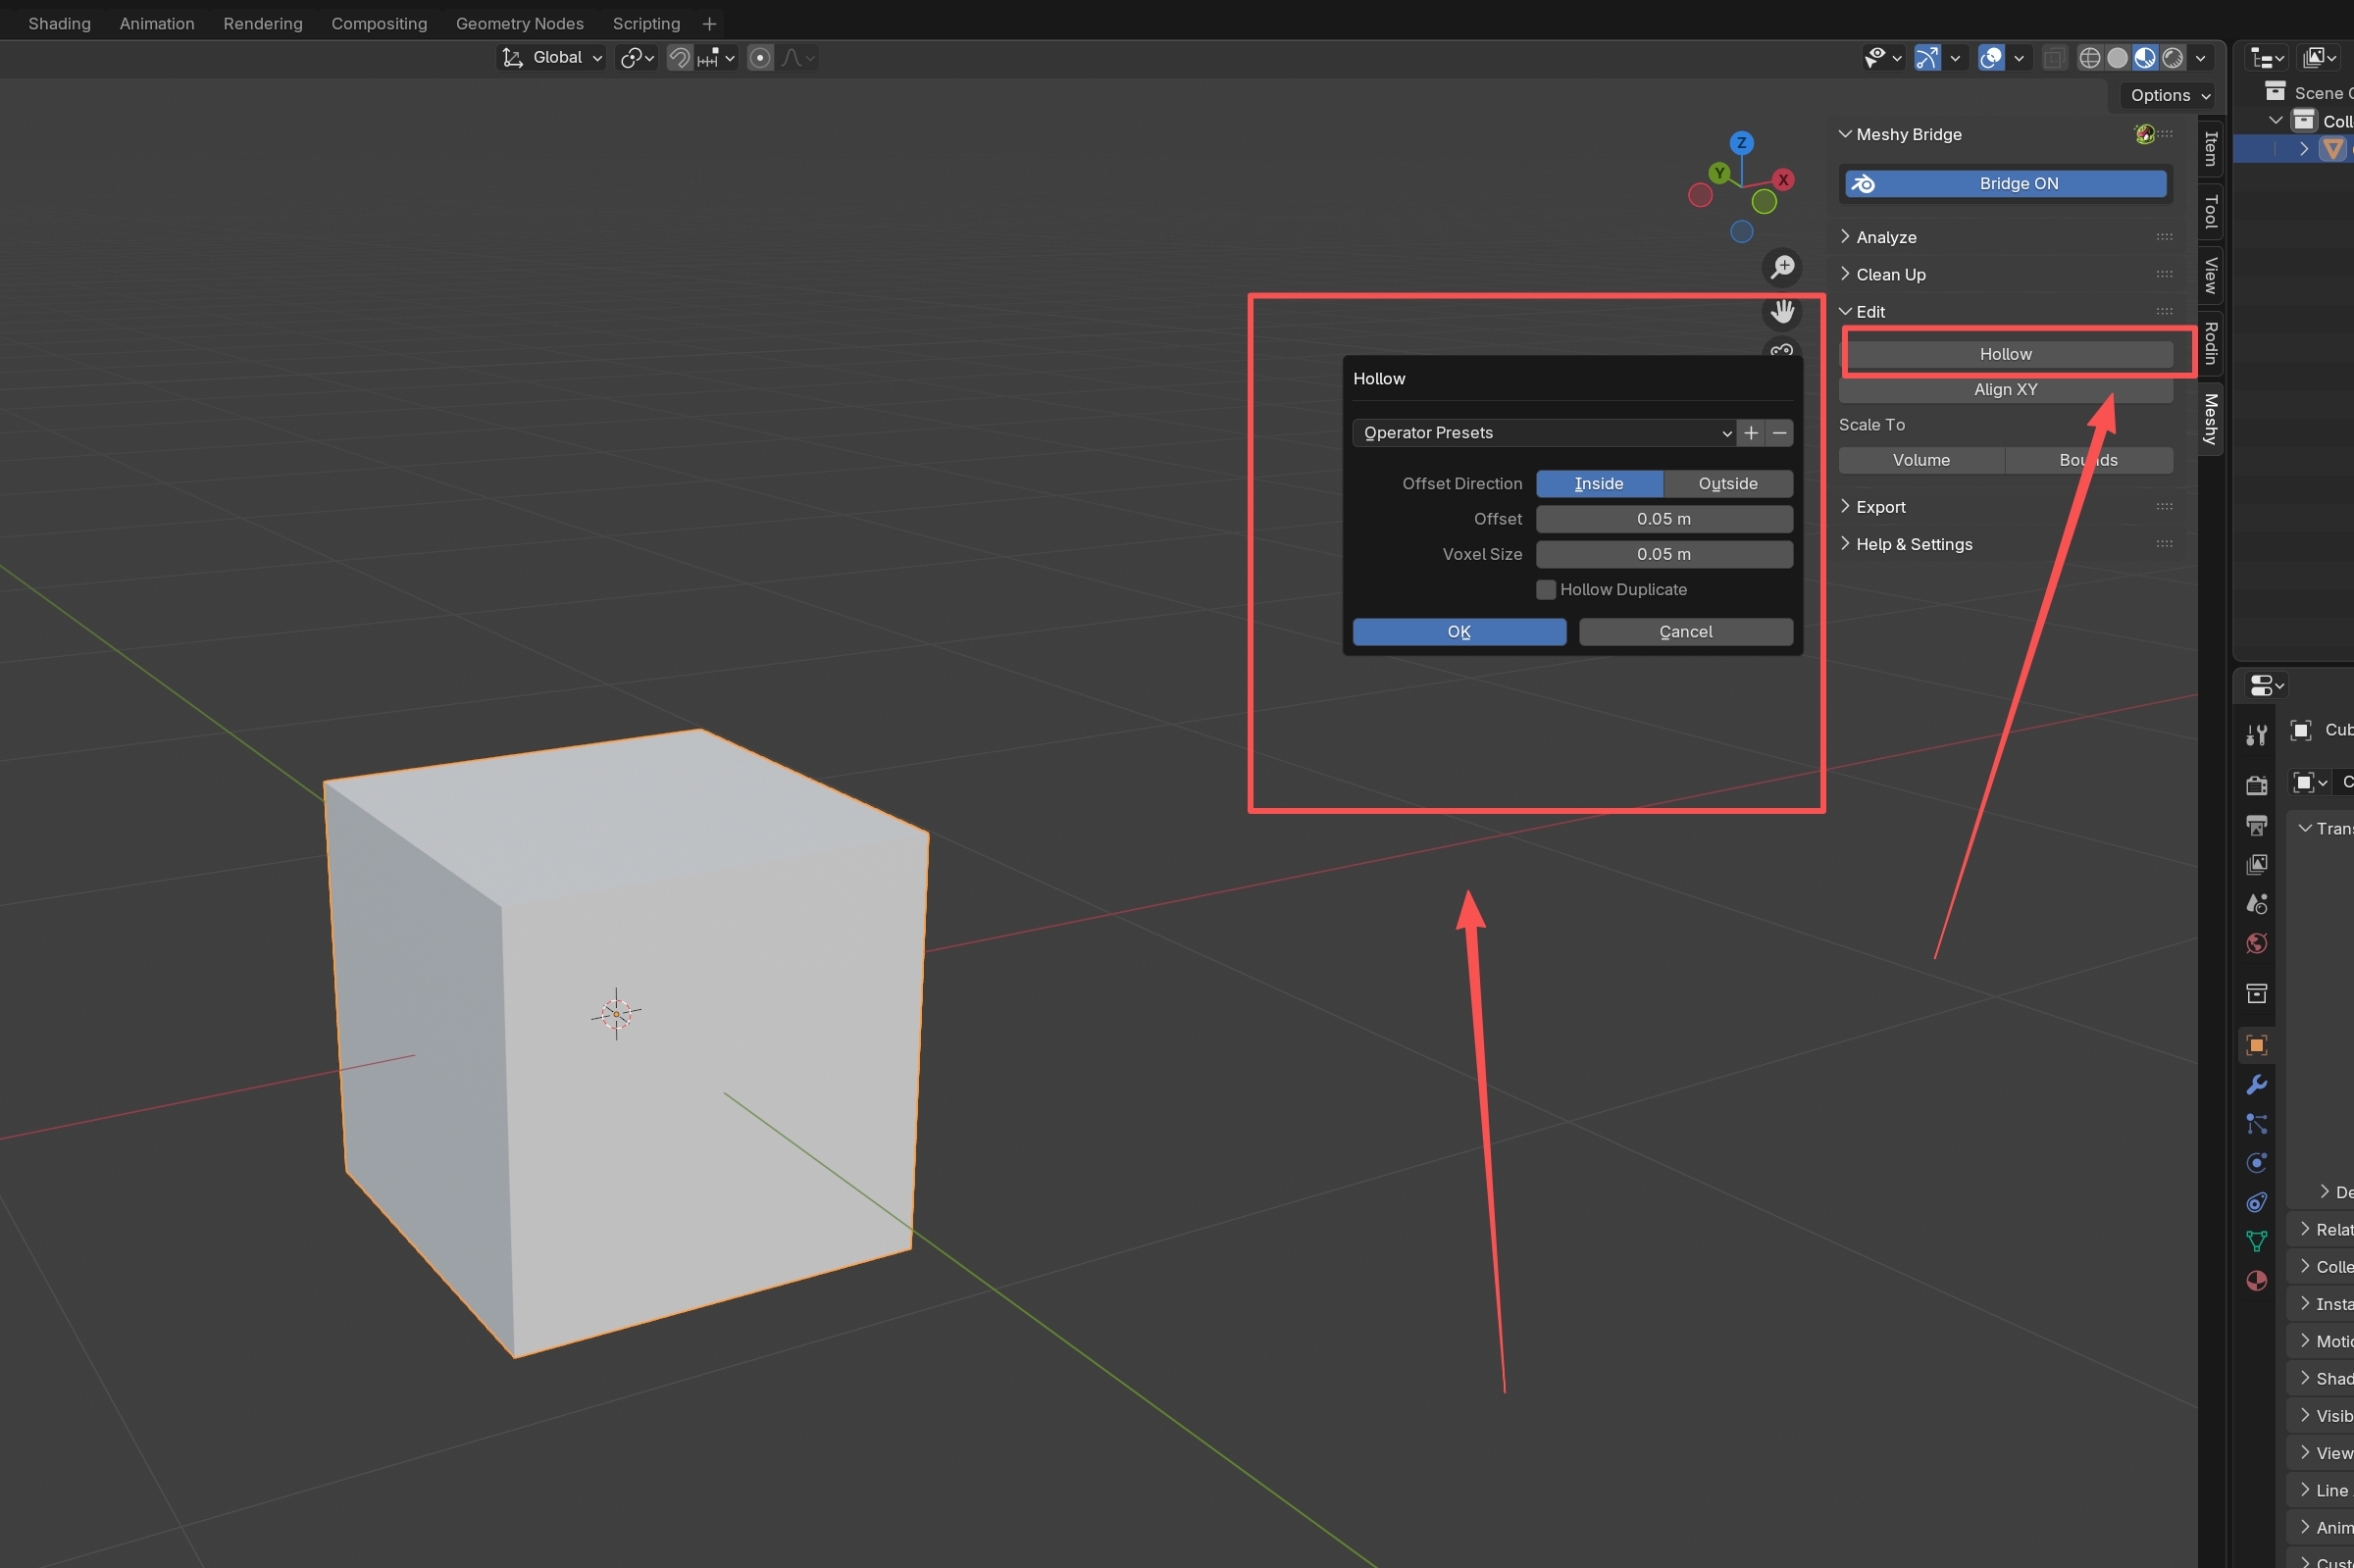
When you click Hollow, a dialog appears with these options:
-
Offset Direction: Choose whether to offset inward or outward
- Inside: Creates a shell inside the original model (most common)
- Outside: Creates a shell outside the original model
-
Offset: The thickness of the shell wall (default: 1.0 units)
- Larger values create thicker walls
- Must be less than half the model's thickness
-
Voxel Size: The resolution of the voxel grid used for calculation
- Smaller values preserve more detail but process slower
- Default: 1.0 units
- Lower values (0.1-0.5) for fine details
- Higher values (1.0-2.0) for faster processing
-
Hollow Duplicate: Creates a hollowed copy while keeping the original
- If enabled, both original and hollow versions are kept
- If disabled, only the hollow version remains
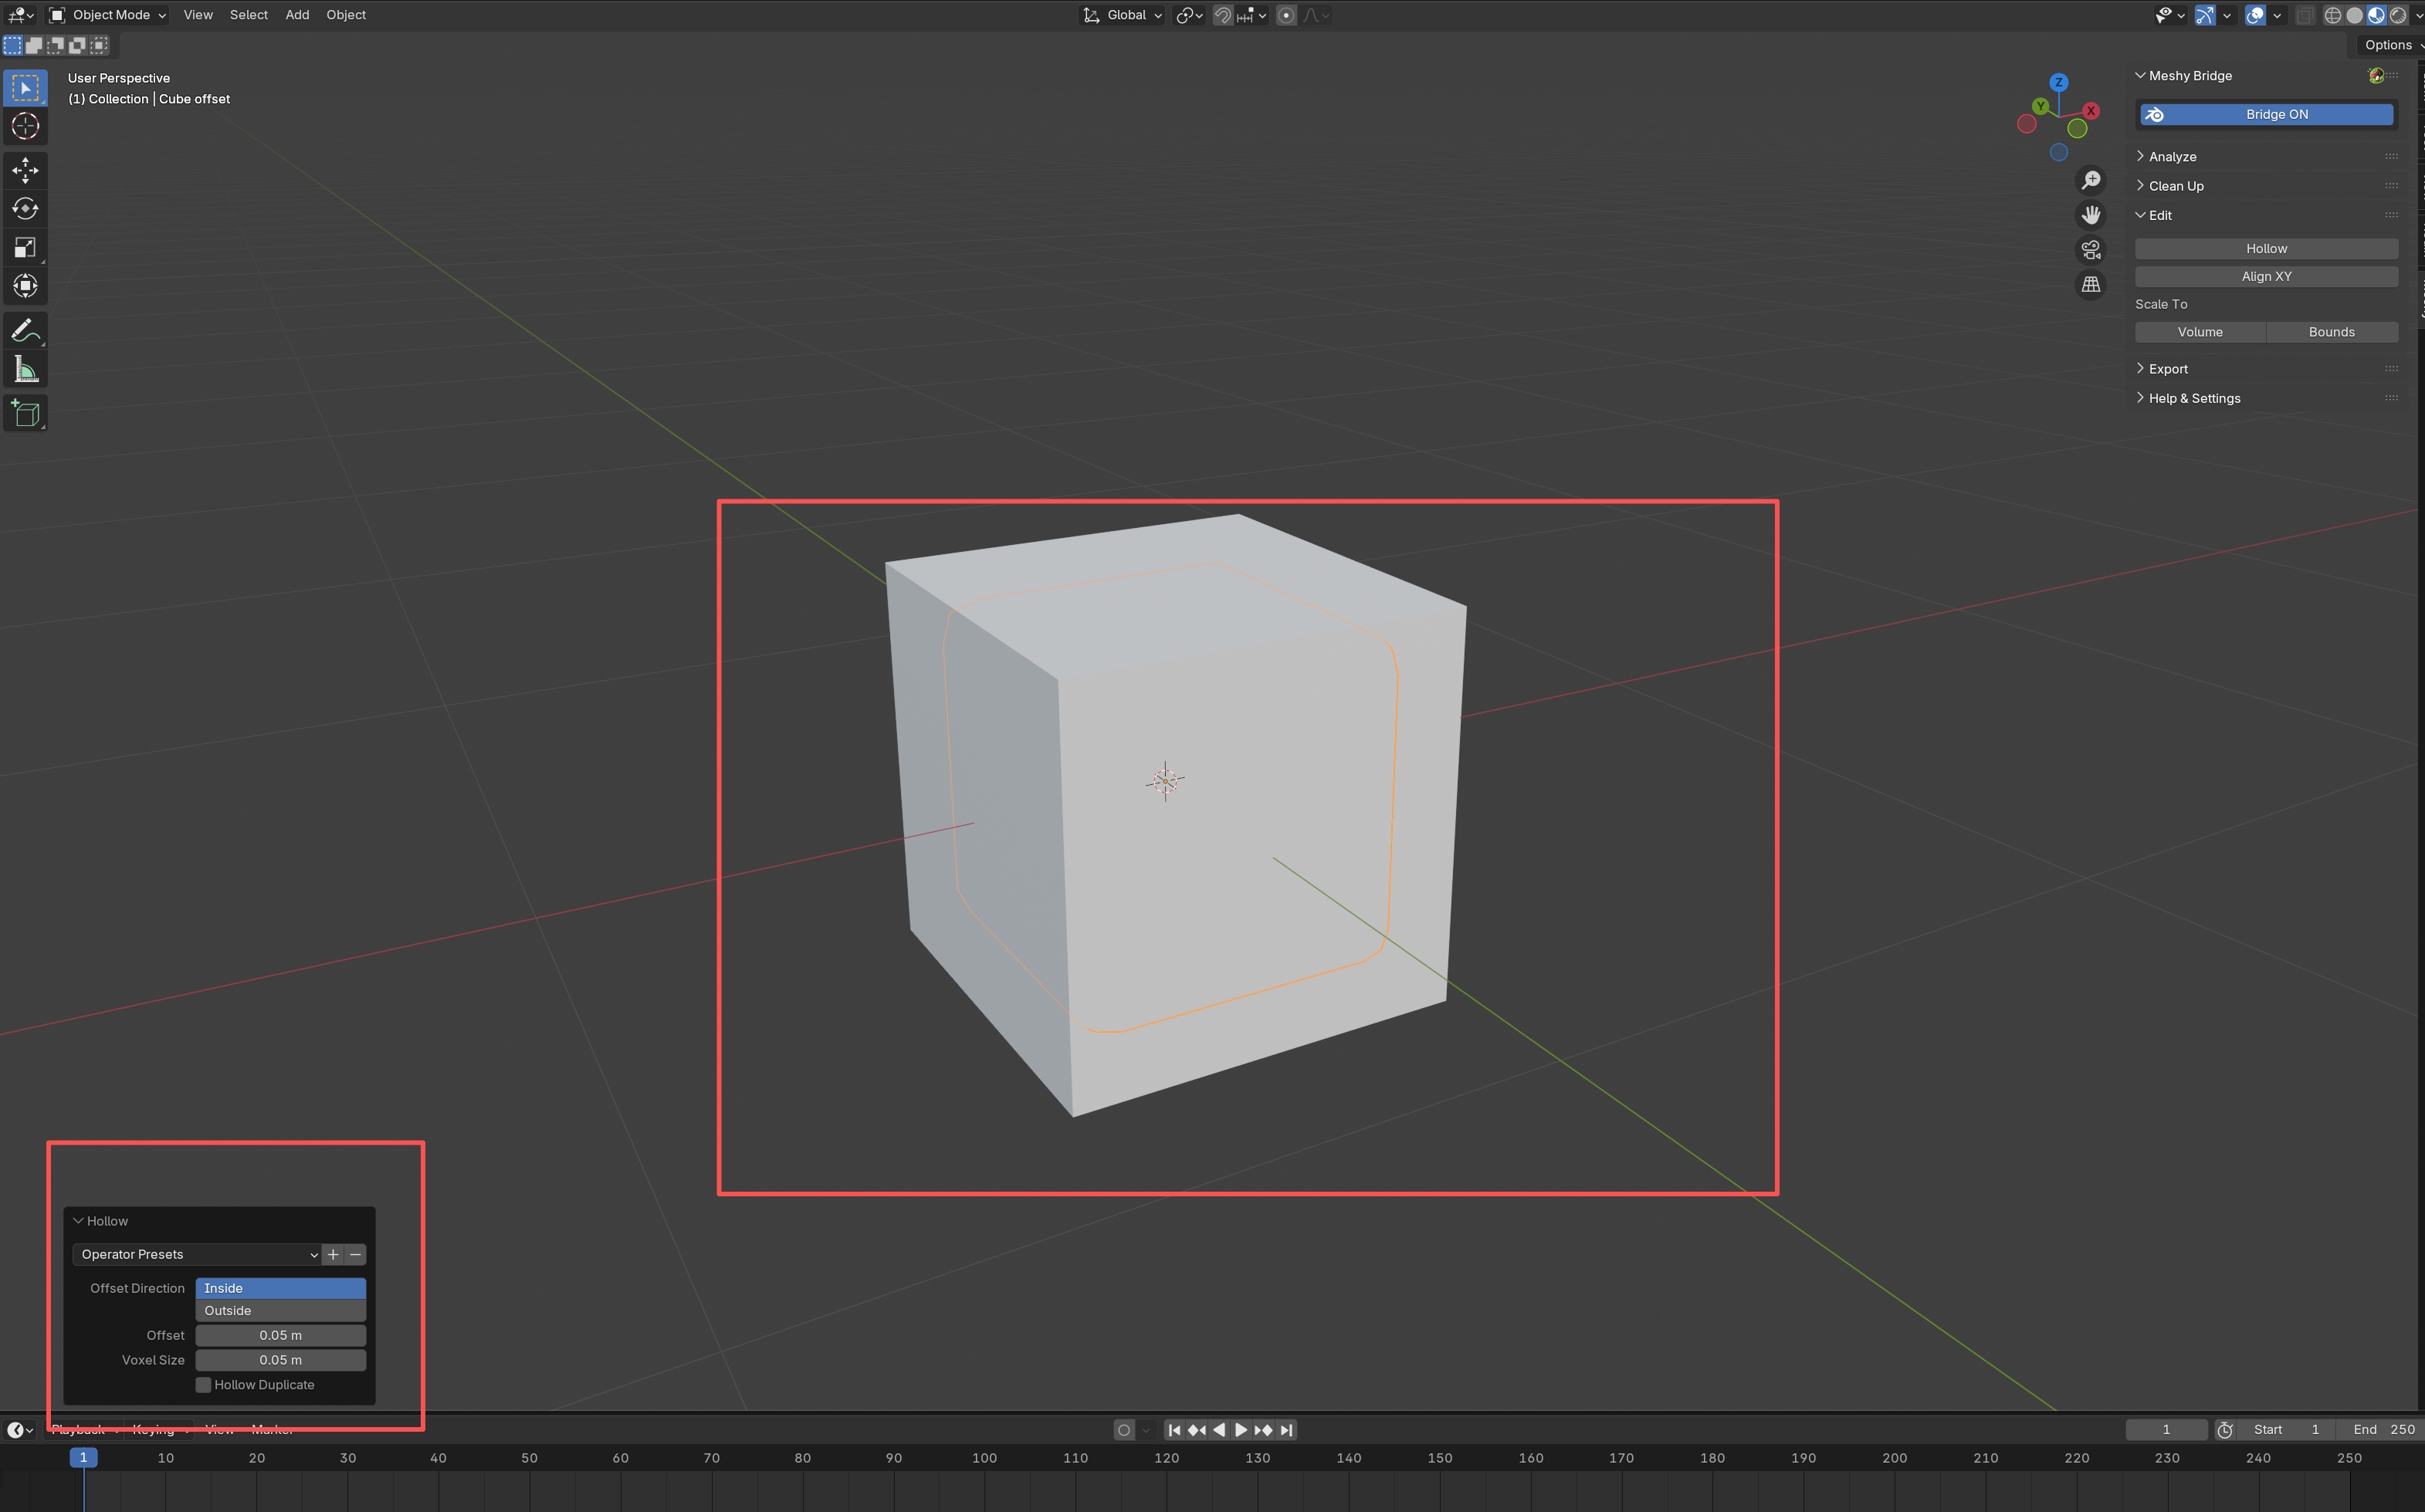
How to Use
- Select your model
- Click Hollow in the Edit panel
- Adjust parameters in the dialog
- Click OK to create the hollow model
Tips
- Check Thickness First: Use the Analyze panel's Thickness check to ensure your model has adequate wall thickness before hollowing
- Start Conservative: Begin with smaller offset values and increase if needed
- Voxel Size: Use smaller voxel sizes for models with fine details
- Test First: Try hollowing on a copy of your model first
The hollow tool requires a closed, watertight mesh. Make sure your model is manifold (use Make Manifold in the Clean Up panel first). If the offset is too large relative to the model thickness, the operation may fail.
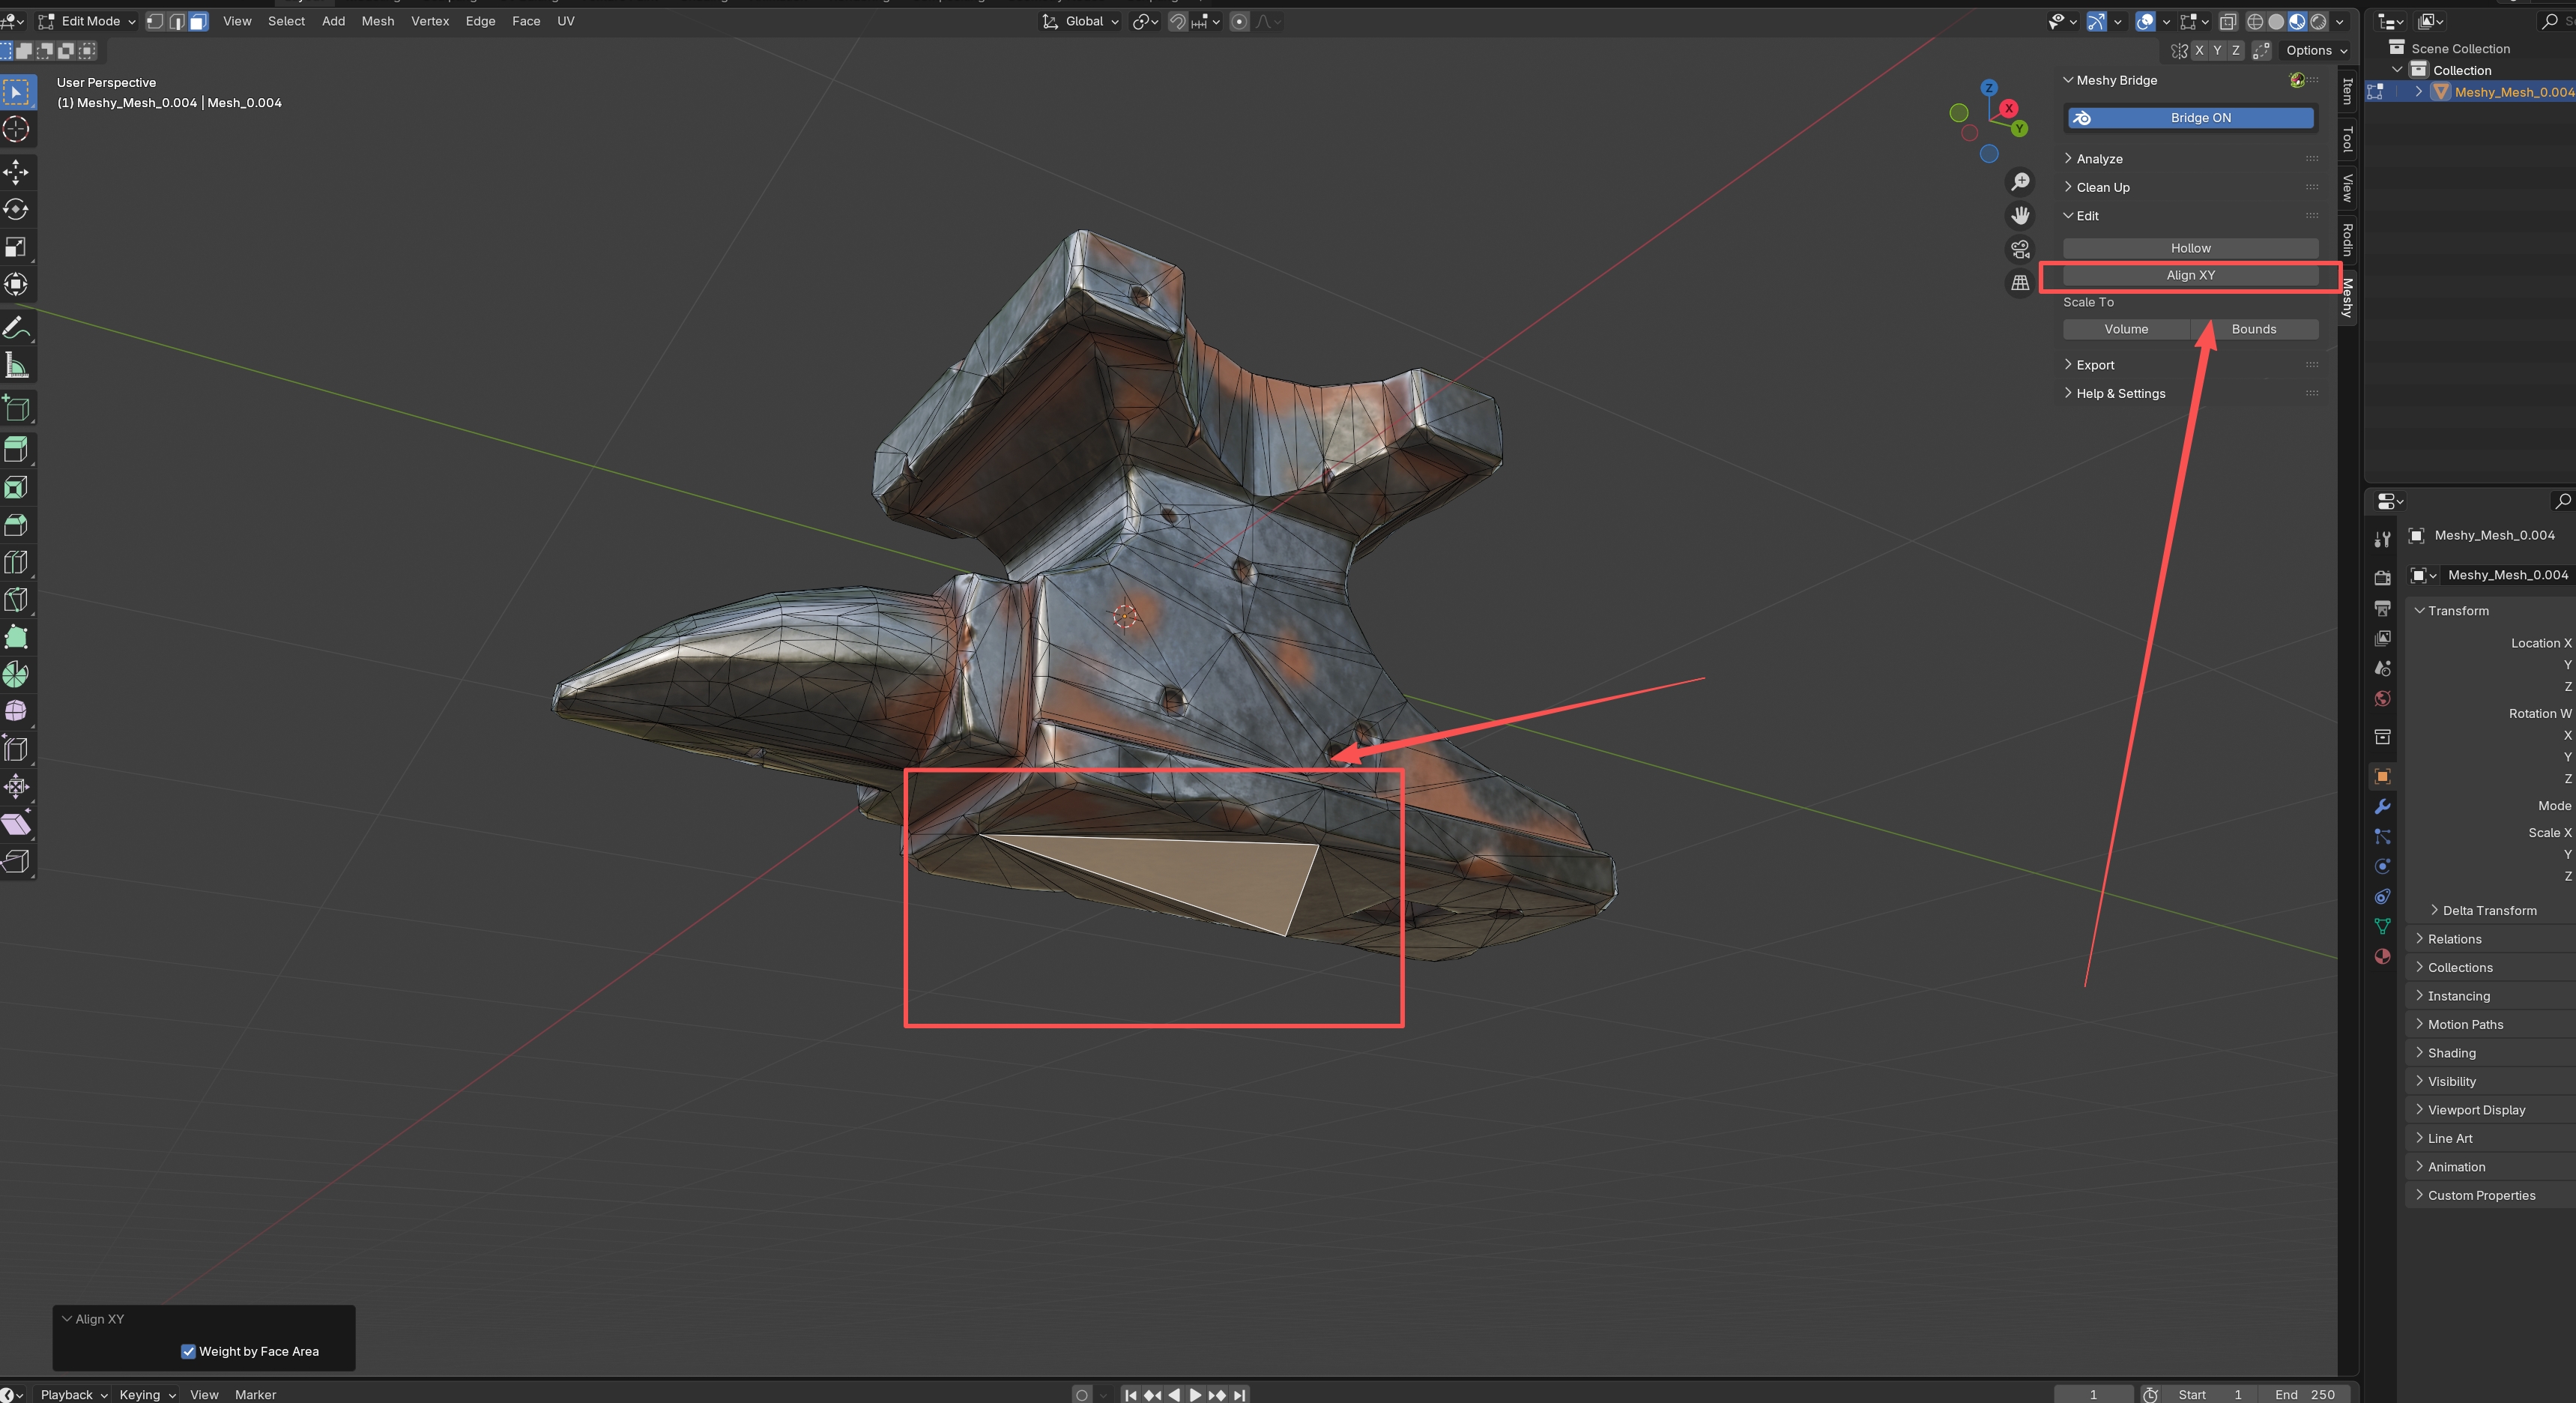
Align XY
The Align XY tool rotates your model so that selected faces lie parallel to the XY plane (ground plane). This is essential for:
- Ensuring models sit flat on the print bed
- Proper orientation for 3D printing
- Aligning models to a specific plane
How to Use
- Select your model
- Enter Edit Mode (press
Tab) - Select the faces you want to align to the ground (typically the bottom faces)
- Click Align XY
The model will automatically rotate so the selected faces are parallel to the XY plane.
Options
- Weight by Face Area: When enabled, larger faces have more influence on the rotation calculation
- Recommended for models with varying face sizes
- Provides more stable results
Tips
- Select Bottom Faces: Select the faces that should touch the print bed
- Multiple Objects: You can align multiple objects at once by selecting them all
- Check Orientation: After aligning, verify the model orientation is correct
Scale to Volume
The Scale to Volume tool scales your model to a specific volume. This is useful for:
- Ensuring models meet size requirements
- Matching volumes between different models
- Preparing models for specific material quantities
How to Use
- Select your model(s)
- Click Scale to Volume
- A dialog appears showing the current volume
- Enter your desired volume
- Click OK to scale
The model will be scaled proportionally to match the target volume.
Tips
- Current Volume: The dialog shows the current volume, which you can use as a reference
- Proportional Scaling: The model scales uniformly in all directions
- Multiple Objects: If multiple objects are selected, their combined volume is used
Scale to Bounds
The Scale to Bounds tool scales your model to fit within a maximum length along its longest axis. This is useful for:
- Ensuring models fit within print bed dimensions
- Meeting size constraints
- Standardizing model sizes
How to Use
- Select your model(s)
- Click Scale to Bounds
- A dialog appears showing the current longest dimension
- Enter your desired maximum length
- Click OK to scale
The model will be scaled so its longest dimension matches the target length.
Tips
- Longest Axis: The tool automatically identifies and scales based on the longest axis
- Proportional: The model maintains its proportions
- Print Bed Size: Use your printer's bed dimensions as a reference
A typical workflow for preparing models:
- Analyze - Check for issues
- Clean Up - Fix geometry problems
- Edit - Adjust size and orientation (Scale to Bounds, Align XY)
- Hollow (optional) - Reduce material usage
- Analyze Again - Verify everything is correct
- Export - Save in STL format for printing