Quickstart
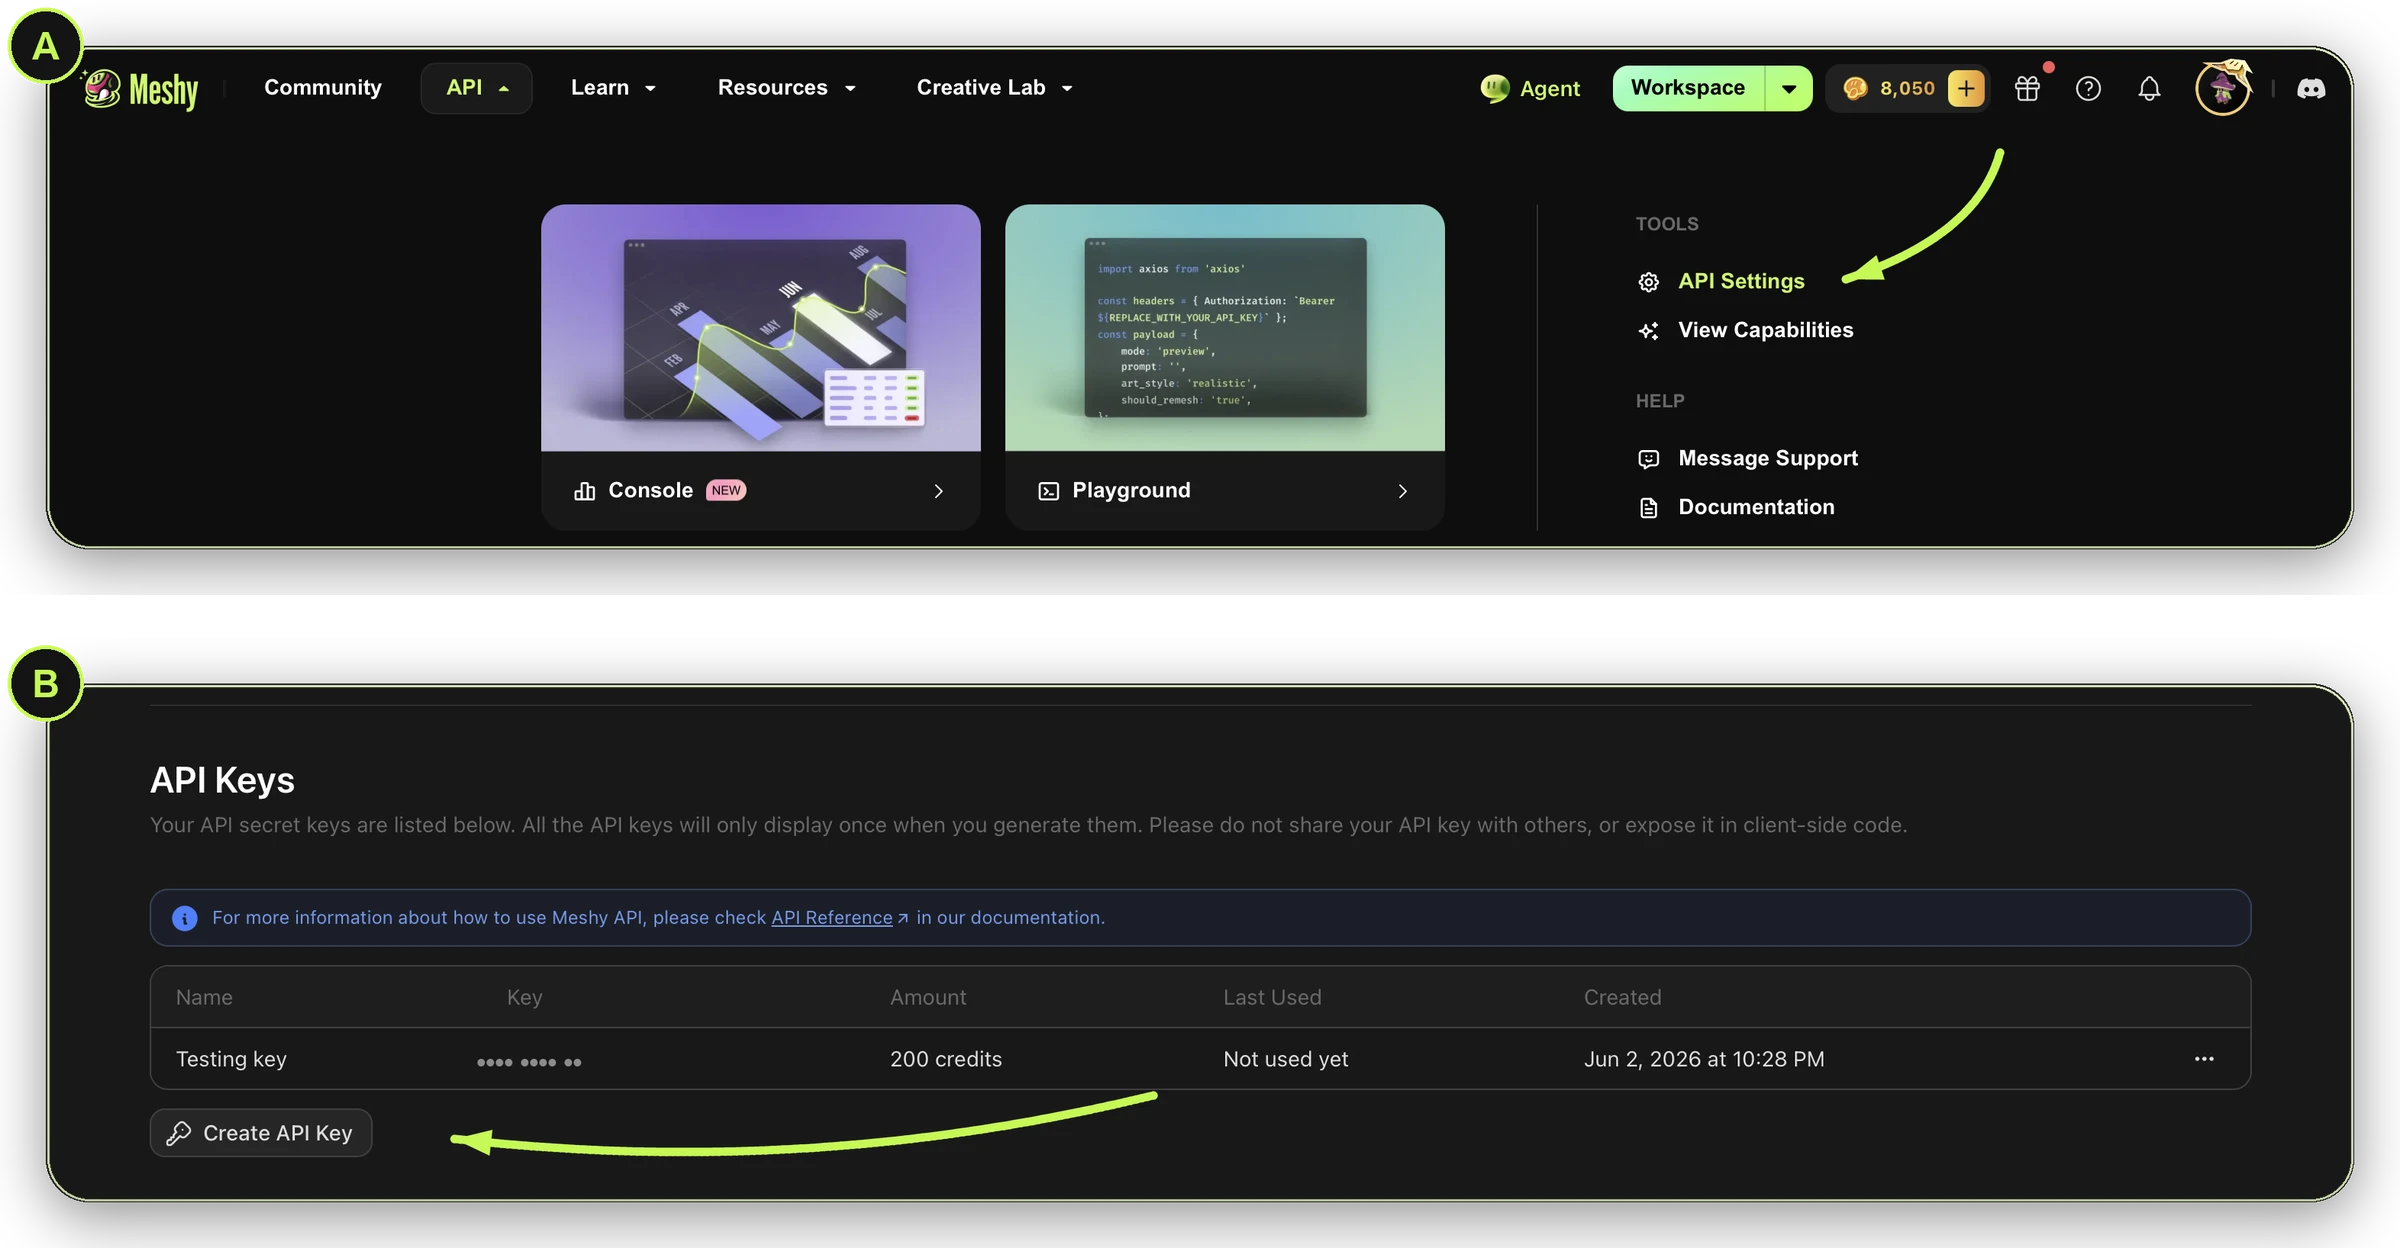
Start by creating your API key
Every request in this guide needs one. Creating a key takes seconds.
Create your API keyFour steps to your first 3D model, using the Meshy REST API.
Using an AI coding assistant? See our AI Integration page — install the Meshy MCP server for tool-calling access from Claude Code, Cursor, Windsurf, and other MCP-compatible tools, or point a plain chat agent at llms.txt.
1Get your API key
Create an API key from the API Keys page in the Developer Platform — you won't be able to view it again after this screen, so store it somewhere safe. Every request authenticates with a Bearer token in the Authorization header — see Authentication.
Creating and managing API keys requires a paid plan. Free accounts get a dedicated, built-in key for testing in the Playground, but can't create or manage keys of their own.
Security tip: avoid pasting your key directly into scripts — store it as an environment variable instead: export MESHY_API_KEY="msy_...".
2Make your first Image-to-3D request
Export your key, then create your first task with Image to 3D. Working from a text prompt or multiple photos instead? See Text to 3D or Multi-Image to 3D.
Export your key
export MESHY_API_KEY="<your-api-key>"
Run this in your terminal (Terminal on macOS, Command Prompt or PowerShell on Windows) — not in a browser.
Every example below uses this photo — swap in your own image_url to try something else.
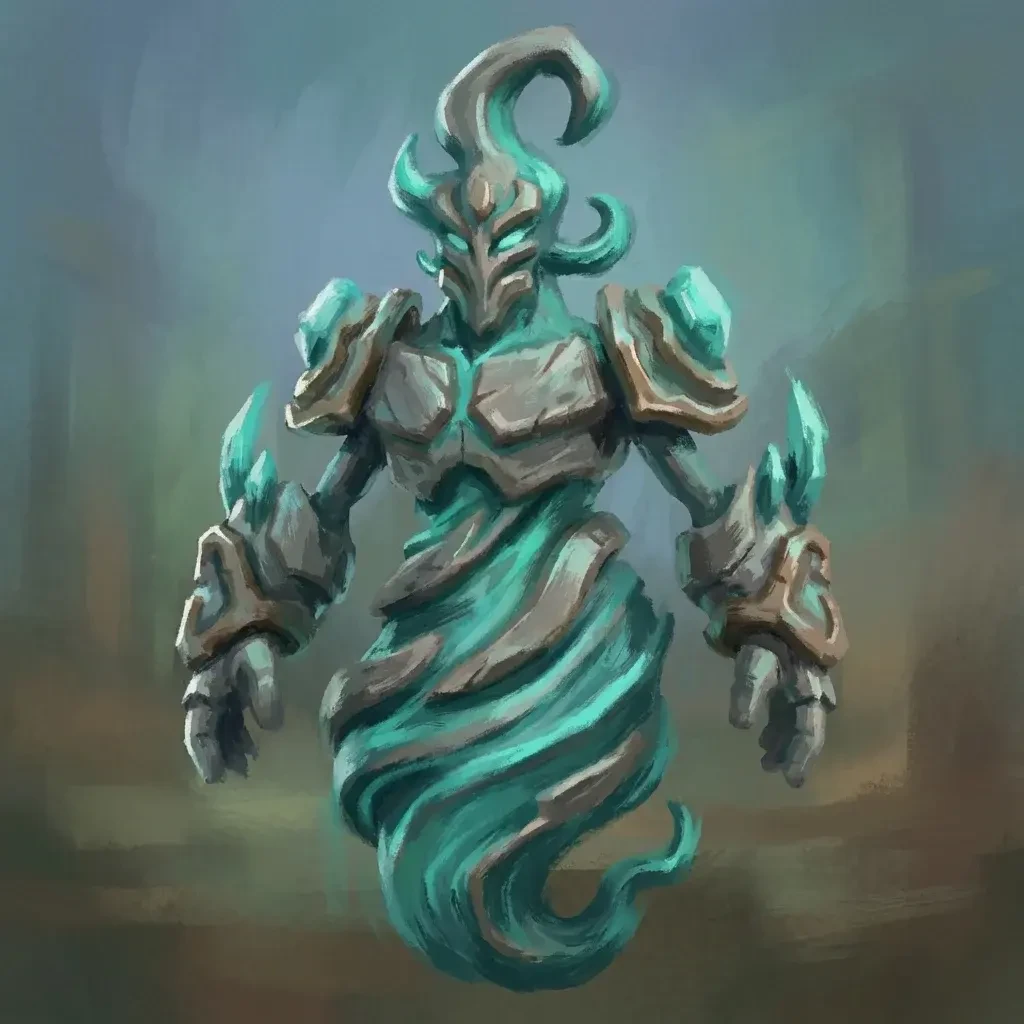
Request
curl https://api.meshy.ai/openapi/v1/image-to-3d \
  -X POST \
  -H "Authorization: Bearer ${MESHY_API_KEY}" \
  -H "Content-Type: application/json" \
  -d '{
    "image_url": "https://docs.meshy.ai/images/api/quick-start/source-photo.webp"
  }'
3Check task status
The task runs in the background and usually takes a few minutes. Poll the same endpoint until status is SUCCEEDED, FAILED or CANCELED, replacing <task_id> below with the ID returned in step 2. For typical times and how long to wait, see Task Lifecycle.
Request
curl https://api.meshy.ai/openapi/v1/image-to-3d/<task_id> \
  -H "Authorization: Bearer ${MESHY_API_KEY}"
Response — SUCCEEDED
{
  "id": "018a210d-8ba4-705c-b111-1f1776f7f578",
  "status": "SUCCEEDED",
  "progress": 100,
  "model_urls": {
    "glb": "https://assets.meshy.ai/***/tasks/018a210d-8ba4-705c-b111-1f1776f7f578/output/model.glb?Expires=***",
    "fbx": "https://assets.meshy.ai/***/tasks/018a210d-8ba4-705c-b111-1f1776f7f578/output/model.fbx?Expires=***"
  },
  "thumbnail_url": "https://assets.meshy.ai/***/tasks/018a210d-8ba4-705c-b111-1f1776f7f578/output/preview.png?Expires=***",
  "task_error": {
    "message": ""
  }
}
Polling not your style? Use SSE streaming or a webhook to get notified the moment a task finishes.
4Download your model
Grab the model from model_urls in the response above. Each format (GLB, FBX, OBJ, USDZ, STL) is a signed, time-limited URL — or skip the command line and paste the URL directly into your browser's address bar to download it.
Download
curl -L "<model_urls.glb from the response above>" -o model.glb
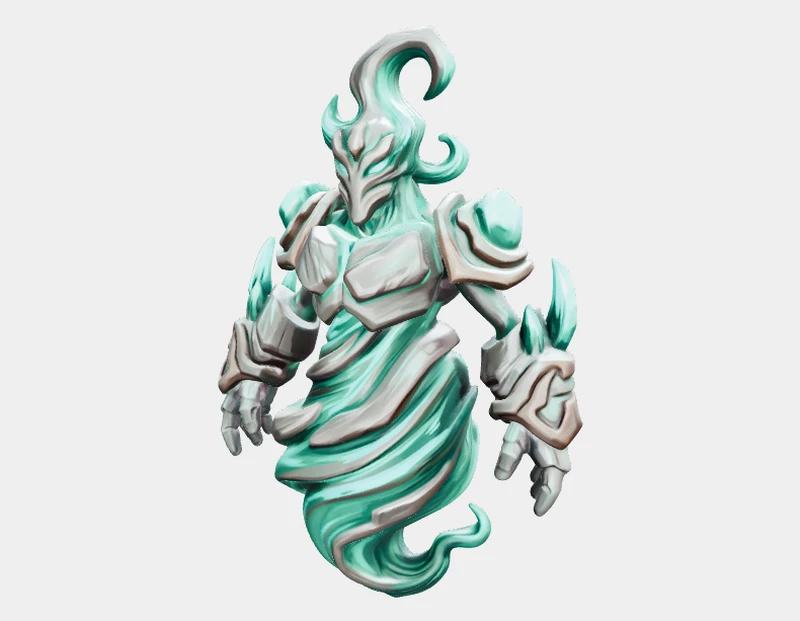
Files are retained for 3 days on non-Enterprise plans — see Asset Retention.
Put it all together
Prefer one script that does the whole thing — create, poll, download?
Full script
import axios from 'axios';
import fs from 'fs';

const headers = { Authorization: `Bearer ${process.env.MESHY_API_KEY}` };
const imageUrl = 'https://docs.meshy.ai/images/api/quick-start/source-photo.webp';

// 1. Create the task
const { data: created } = await axios.post(
  'https://api.meshy.ai/openapi/v1/image-to-3d',
  { image_url: imageUrl },
  { headers, timeout: 60_000 },
);
const taskId = created.result;

// 2. Poll until it finishes, for up to 60 minutes
const deadline = Date.now() + 60 * 60 * 1000;
let task;
while (true) {
  const { data, headers: resHeaders } = await axios.get(
    `https://api.meshy.ai/openapi/v1/image-to-3d/${taskId}`,
    { headers, timeout: 30_000 },
  );
  task = data;
  if (['SUCCEEDED', 'FAILED', 'CANCELED'].includes(task.status)) break;
  if (Date.now() > deadline) {
    // The task is still running. Check it again later with the same task ID instead of creating a new one.
    throw new Error(`Task ${taskId} is still ${task.status}; check it again later`);
  }
  const waitSeconds = Number(resHeaders['retry-after']) || 5;
  await new Promise((resolve) => setTimeout(resolve, waitSeconds * 1000));
}

// 3. Download the result (only if the task succeeded)
if (task.status !== 'SUCCEEDED') {
  throw new Error(`Task ${task.status}: ${task.task_error?.message || 'unknown error'}`);
}
const { data: model } = await axios.get(task.model_urls.glb, { responseType: 'arraybuffer' });
fs.writeFileSync('model.glb', model);
console.log('Saved model.glb');
Explore common workflows
Game-ready character
Rig a humanoid mesh with a skeleton so it's ready to animate in Unity or Unreal.
Learn more →Lowpoly asset
Set model_type to smart-topology on Image to 3D for a clean, game-ready mesh.
3D print model
Convert a finished model into a multi-color 3MF file, ready to slice and print.
Learn more →Next steps
- Prefer a UI? Open the Developer Platform — run requests in the Playground, track usage and request logs, and manage webhooks.
- Browse the full API reference for every endpoint.
- Learn from working examples: follow step-by-step recipes in the Cookbook and read tutorials and build stories on the Developer Blog.
- Check Pricing, Rate Limits, and Errors before you go to production.
- Watch the Changelog for updates and bug fixes.
- Have feedback or facing issues? Join our Discord community — we'd love to hear from you!