क्विकस्टार्ट
अपनी API की बनाकर शुरुआत करें
इस गाइड में हर अनुरोध के लिए इसकी आवश्यकता होती है। एक की बनाने में बस कुछ सेकंड लगते हैं।
अपनी API की बनाएंMeshy REST API का उपयोग करके अपना पहला 3D मॉडल बनाने के चार चरण।
AI कोडिंग असिस्टेंट का उपयोग कर रहे हैं? हमारा AI इंटीग्रेशन पेज देखें — Claude Code, Cursor, Windsurf, और अन्य MCP-संगत टूल्स से टूल-कॉलिंग एक्सेस के लिए Meshy MCP server इंस्टॉल करें, या किसी सामान्य चैट एजेंट को llms.txt पर पॉइंट करें।
1अपनी API की प्राप्त करें
Developer Platform के API Keys पेज से API की बनाएं — इस स्क्रीन के बाद आप इसे दोबारा नहीं देख पाएंगे, इसलिए इसे किसी सुरक्षित जगह पर संग्रहीत करें। हर अनुरोध Authorization हेडर में Bearer टोकन के साथ प्रमाणीकृत होता है — देखें Authentication।
API कीज़ बनाने और प्रबंधित करने के लिए पेड प्लान आवश्यक है। फ्री खातों को Playground में परीक्षण के लिए एक समर्पित, अंतर्निर्मित की मिलती है, लेकिन वे अपनी खुद की कीज़ नहीं बना या प्रबंधित कर सकते।
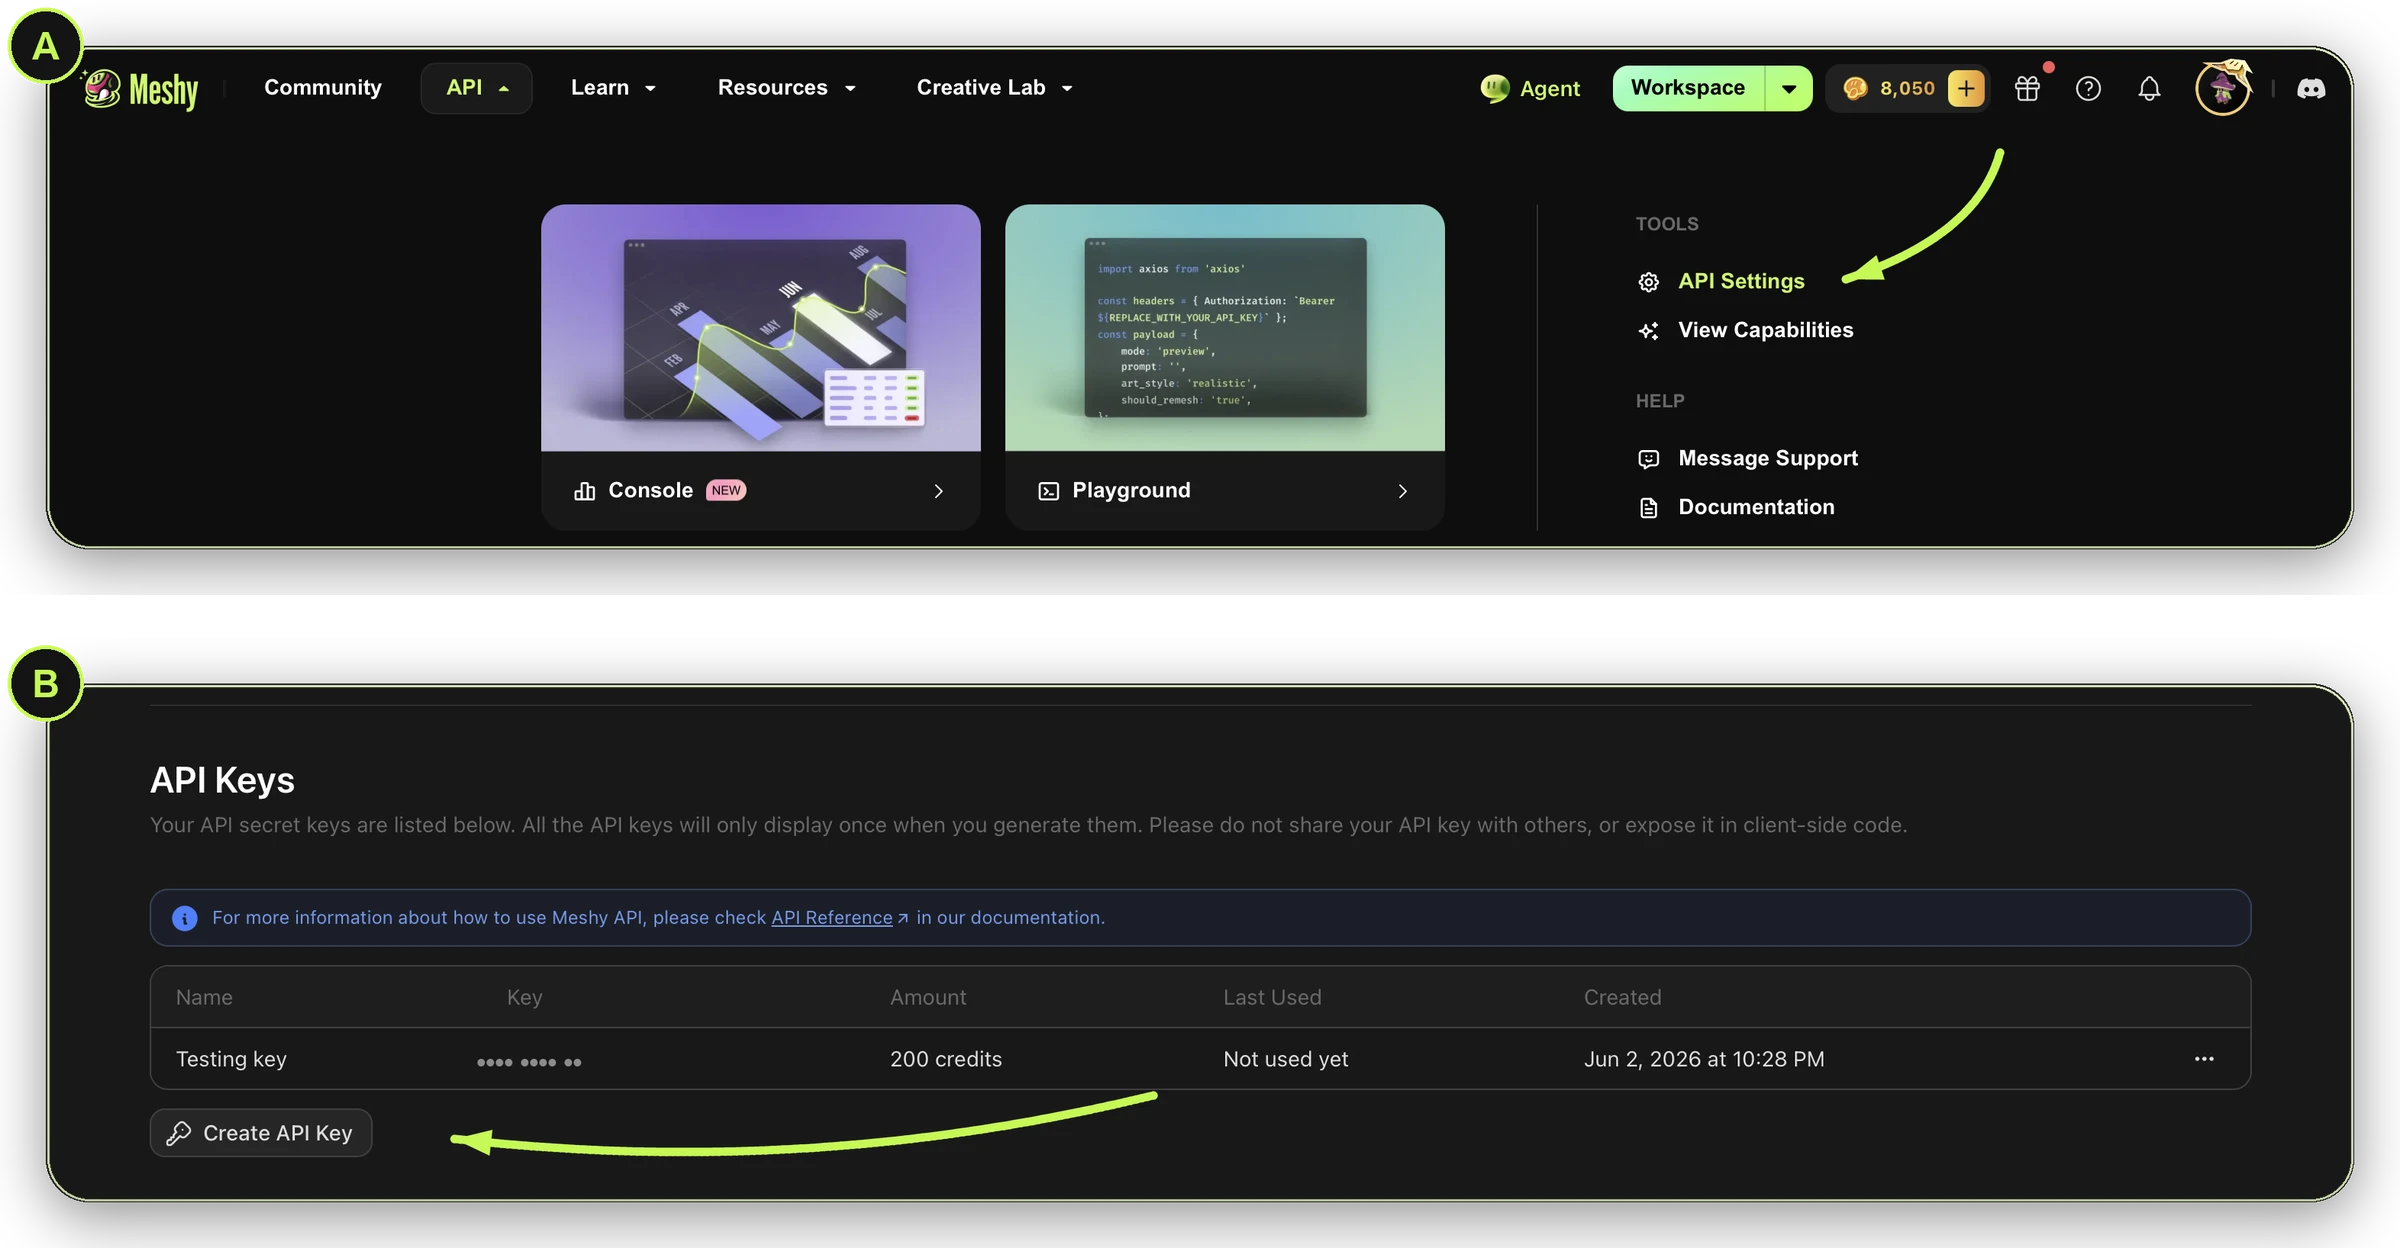
सुरक्षा सुझाव: अपनी की को सीधे स्क्रिप्ट्स में पेस्ट करने से बचें — इसके बजाय इसे एक environment variable के रूप में संग्रहीत करें: export MESHY_API_KEY="msy_...".
2अपनी पहली Image-to-3D request बनाएं
अपनी key एक्सपोर्ट करें, फिर Image to 3D के साथ अपना पहला टास्क बनाएं। क्या आप इसके बजाय किसी टेक्स्ट prompt या कई फोटो के साथ काम कर रहे हैं? Text to 3D या Multi-Image to 3D देखें।
Export your key
export MESHY_API_KEY="<your-api-key>"
इसे अपने terminal में चलाएं (macOS पर Terminal, Windows पर Command Prompt या PowerShell) — किसी browser में नहीं।
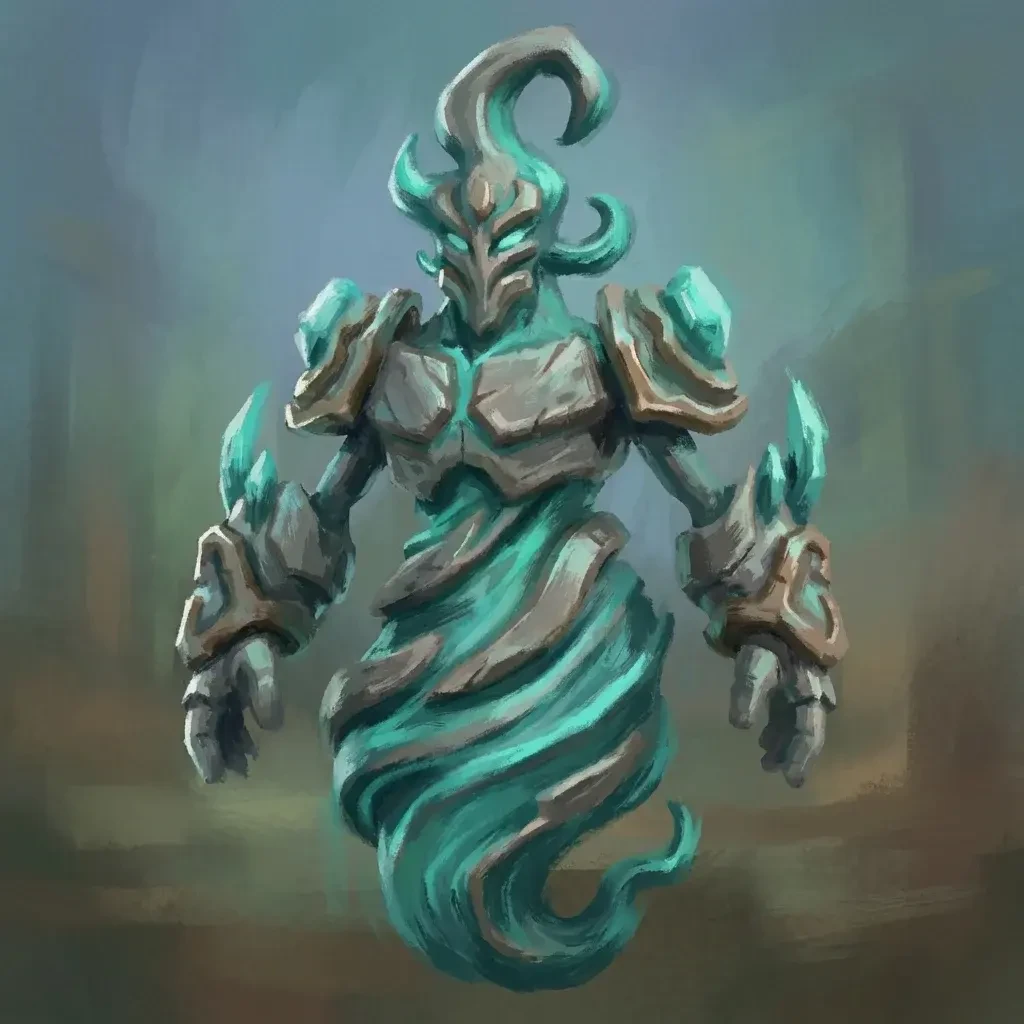
नीचे दिया गया हर उदाहरण इसी फोटो का उपयोग करता है — कुछ और आज़माने के लिए अपना खुद का image_url डालें।
Request
curl https://api.meshy.ai/openapi/v1/image-to-3d \
  -X POST \
  -H "Authorization: Bearer ${MESHY_API_KEY}" \
  -H "Content-Type: application/json" \
  -d '{
    "image_url": "https://docs.meshy.ai/images/api/quick-start/source-photo.webp"
  }'
3टास्क की स्थिति जांचें
टास्क बैकग्राउंड में चलता है और आमतौर पर इसमें कुछ मिनट लगते हैं। उसी एंडपॉइंट को तब तक पोल करें जब तक status, SUCCEEDED, FAILED या CANCELED न हो जाए, और नीचे <task_id> को चरण 2 में प्राप्त ID से बदलें। सामान्य समय और कितनी देर प्रतीक्षा करनी चाहिए, इसके लिए Task Lifecycle देखें।
Request
curl https://api.meshy.ai/openapi/v1/image-to-3d/<task_id> \
  -H "Authorization: Bearer ${MESHY_API_KEY}"
Response — SUCCEEDED
{
  "id": "018a210d-8ba4-705c-b111-1f1776f7f578",
  "status": "SUCCEEDED",
  "progress": 100,
  "model_urls": {
    "glb": "https://assets.meshy.ai/***/tasks/018a210d-8ba4-705c-b111-1f1776f7f578/output/model.glb?Expires=***",
    "fbx": "https://assets.meshy.ai/***/tasks/018a210d-8ba4-705c-b111-1f1776f7f578/output/model.fbx?Expires=***"
  },
  "thumbnail_url": "https://assets.meshy.ai/***/tasks/018a210d-8ba4-705c-b111-1f1776f7f578/output/preview.png?Expires=***",
  "task_error": {
    "message": ""
  }
}
पोलिंग आपकी शैली नहीं है? किसी टास्क के पूरा होते ही सूचना पाने के लिए SSE streaming या webhook का उपयोग करें।
4अपना मॉडल डाउनलोड करें
ऊपर दिए गए रिस्पॉन्स में से model_urls से मॉडल प्राप्त करें। प्रत्येक फॉर्मेट (GLB, FBX, OBJ, USDZ, STL) एक साइन्ड, समय-सीमित URL है — या कमांड लाइन को छोड़ें और इसे डाउनलोड करने के लिए सीधे अपने ब्राउज़र के एड्रेस बार में URL पेस्ट करें।
Download
curl -L "<model_urls.glb from the response above>" -o model.glb
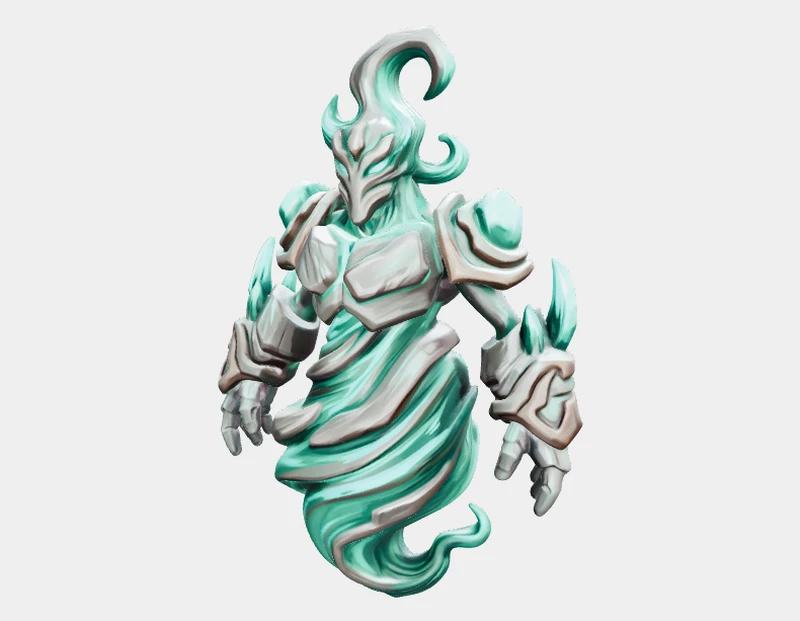
नॉन-एंटरप्राइज़ प्लान पर फ़ाइलें 3 दिनों के लिए रखी जाती हैं — देखें एसेट रिटेंशन।
सब कुछ एक साथ जोड़ें
एक ही स्क्रिप्ट पसंद करें जो पूरा काम करे — बनाना, पोल करना, डाउनलोड करना?
Full script
import axios from 'axios';
import fs from 'fs';

const headers = { Authorization: `Bearer ${process.env.MESHY_API_KEY}` };
const imageUrl = 'https://docs.meshy.ai/images/api/quick-start/source-photo.webp';

// 1. Create the task
const { data: created } = await axios.post(
  'https://api.meshy.ai/openapi/v1/image-to-3d',
  { image_url: imageUrl },
  { headers, timeout: 60_000 },
);
const taskId = created.result;

// 2. Poll until it finishes, for up to 60 minutes
const deadline = Date.now() + 60 * 60 * 1000;
let task;
while (true) {
  const { data, headers: resHeaders } = await axios.get(
    `https://api.meshy.ai/openapi/v1/image-to-3d/${taskId}`,
    { headers, timeout: 30_000 },
  );
  task = data;
  if (['SUCCEEDED', 'FAILED', 'CANCELED'].includes(task.status)) break;
  if (Date.now() > deadline) {
    // The task is still running. Check it again later with the same task ID instead of creating a new one.
    throw new Error(`Task ${taskId} is still ${task.status}; check it again later`);
  }
  const waitSeconds = Number(resHeaders['retry-after']) || 5;
  await new Promise((resolve) => setTimeout(resolve, waitSeconds * 1000));
}

// 3. Download the result (only if the task succeeded)
if (task.status !== 'SUCCEEDED') {
  throw new Error(`Task ${task.status}: ${task.task_error?.message || 'unknown error'}`);
}
const { data: model } = await axios.get(task.model_urls.glb, { responseType: 'arraybuffer' });
fs.writeFileSync('model.glb', model);
console.log('Saved model.glb');
Explore common workflows
Game-ready character
एक ह्यूमनॉइड मेश को स्केलेटन के साथ रिग करें ताकि यह Unity या Unreal में एनिमेट करने के लिए तैयार हो।
Learn more →Lowpoly asset
एक साफ़-सुथरे, गेम-रेडी मेश के लिए इमेज से 3D पर model_type को smart-topology पर सेट करें।
3D print model
एक पूर्ण मॉडल को मल्टी-कलर 3MF फ़ाइल में कन्वर्ट करें, जो स्लाइस और प्रिंट करने के लिए तैयार हो।
Learn more →अगले कदम
- यूज़र इंटरफ़ेस पसंद करते हैं? Developer Platform खोलें — Playground में रिक्वेस्ट चलाएँ, उपयोग और रिक्वेस्ट लॉग ट्रैक करें, और webhooks प्रबंधित करें।
- हर एंडपॉइंट के लिए पूरा API रेफरेंस ब्राउज़ करें।
- काम करते उदाहरणों से सीखें: Cookbook में चरण-दर-चरण रेसिपी फॉलो करें और Developer Blog पर ट्यूटोरियल और बिल्ड स्टोरीज़ पढ़ें।
- प्रोडक्शन में जाने से पहले मूल्य निर्धारण, Rate Limits, और एरर देख लें।
- अपडेट और बग फिक्स के लिए चेंजलॉग पर नज़र रखें।
- कोई फीडबैक है या किसी समस्या का सामना कर रहे हैं? हमारे Discord समुदाय से जुड़ें — हमें आपसे सुनना अच्छा लगेगा!