AI Texturing
This is the official documentation for Meshy AI texturing tool. Here, you'll find detailed instructions on how to use our AI texturing tool to generate texture for your 3D models.
Meshy AI texturing tool allows artists to choose either text or images as input. Currently, our AI is better suited for generating texture for objects such as props, buildings, and weapons, while there is still room for improvement in the quality of generating humans, characters, and animals.
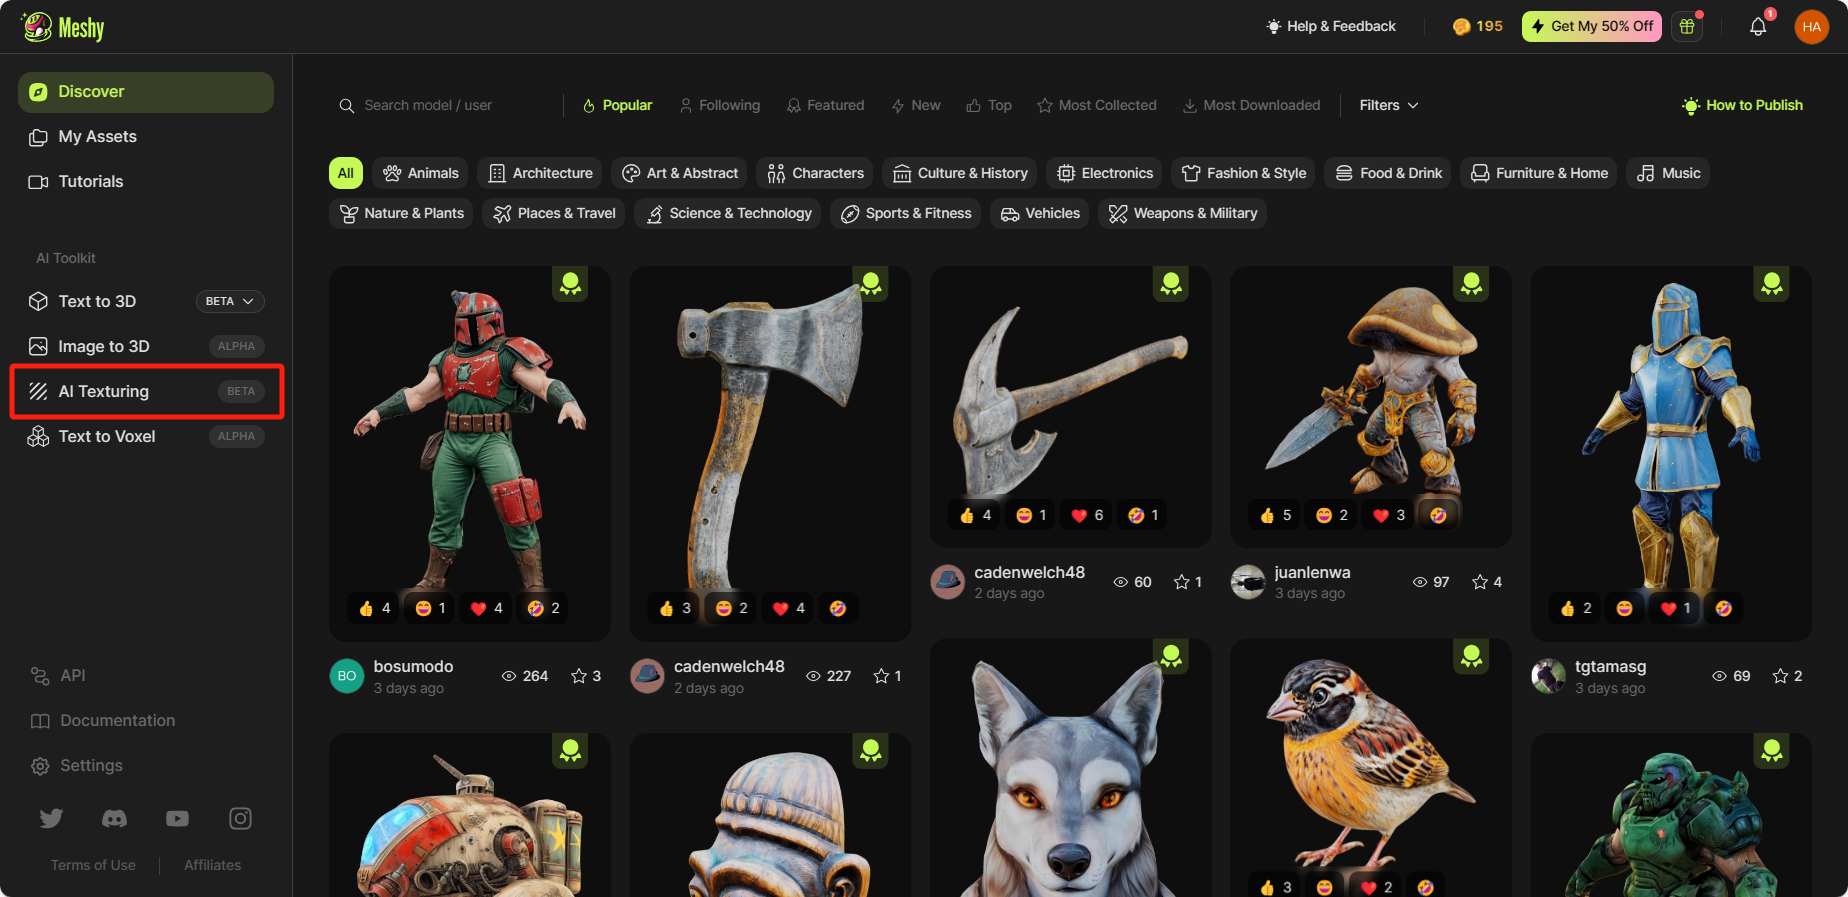
Go to AI Texturing Workspace
To use AI texturing, please click on the AI Texturing tab on the left sidebar.
Upload Your Model
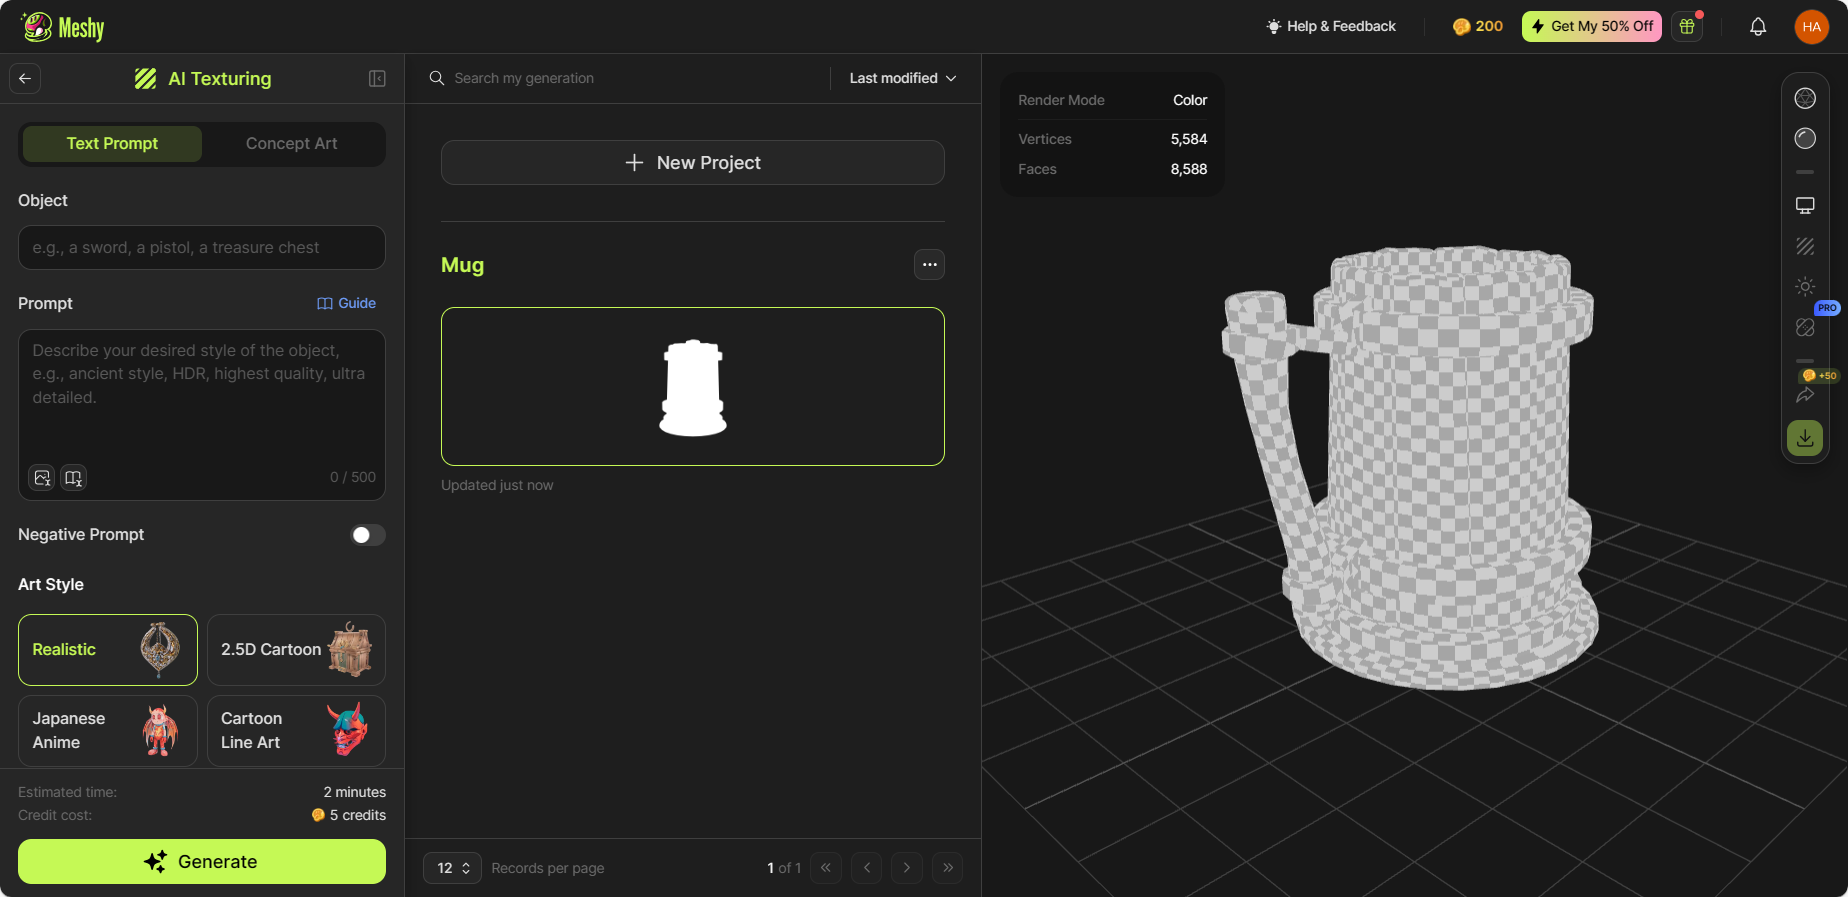
First, click on the “+ New Project” button to create a new project and upload the model you want to texture.
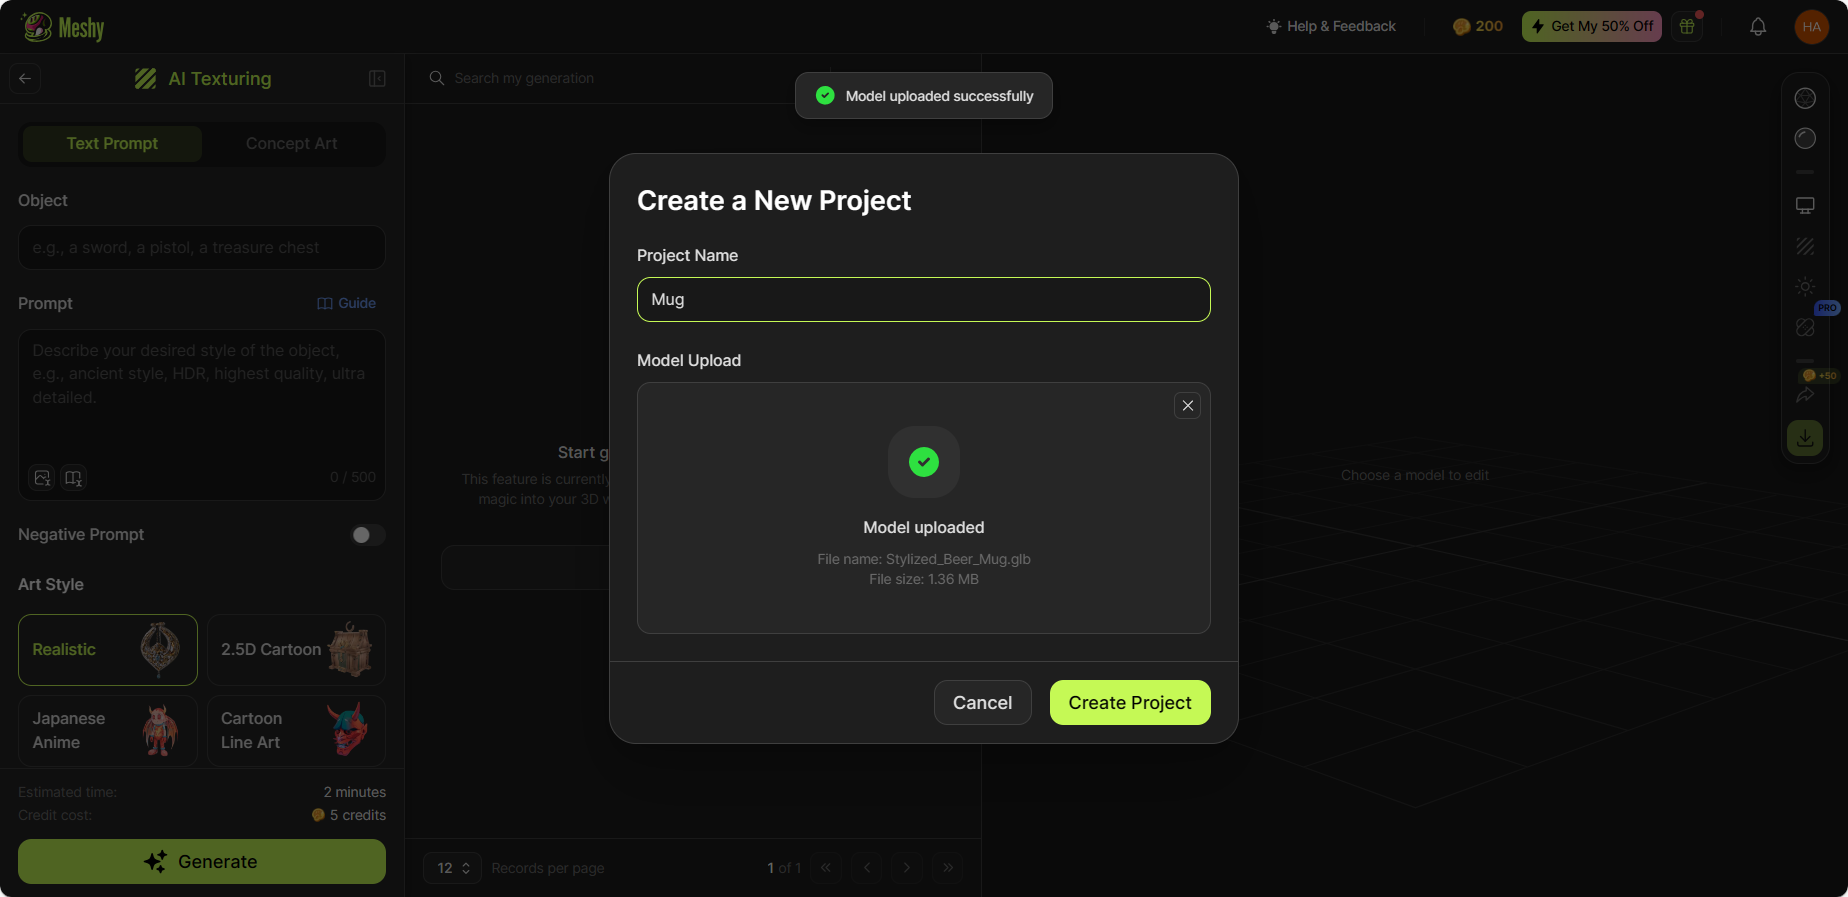
After you have successfully uploaded the model, you can see the model in the 3D viewer.
Model Requirements
File Format
Currently, we support .fbx / .obj / .stl / .gltf / .glb models, and it is preferable for the input models to have UV maps.
File Size
The size limit for each model is 50MB.
UV
It is highly recommended that the model has UV. If the model does not have UV, Meshy will automatically generate a new UV, but the quality might be limited.
The UV coordinates of the model should be in the range of 0 to 1. If the UV information is saved in other locations, such as using UDIM, you need to convert the UV to the range of 0 to 1. Otherwise, the UV provided by you will not be used, instead, Meshy will generate UV for you.
Text to Texture
The default generation mode is to use text prompts as input. In the object box, simply describe the object that you have uploaded, for example, a vase, a house, or a treasure chest. In the style box, you can describe what you want the model to look like. It is recommended that your prompts be specific and descriptive. Try describing the shape, color, size, style, and other attributes of the object you want to generate. If there are specific things you don't want to see in the result, you can also add descriptions in the negative prompt box.
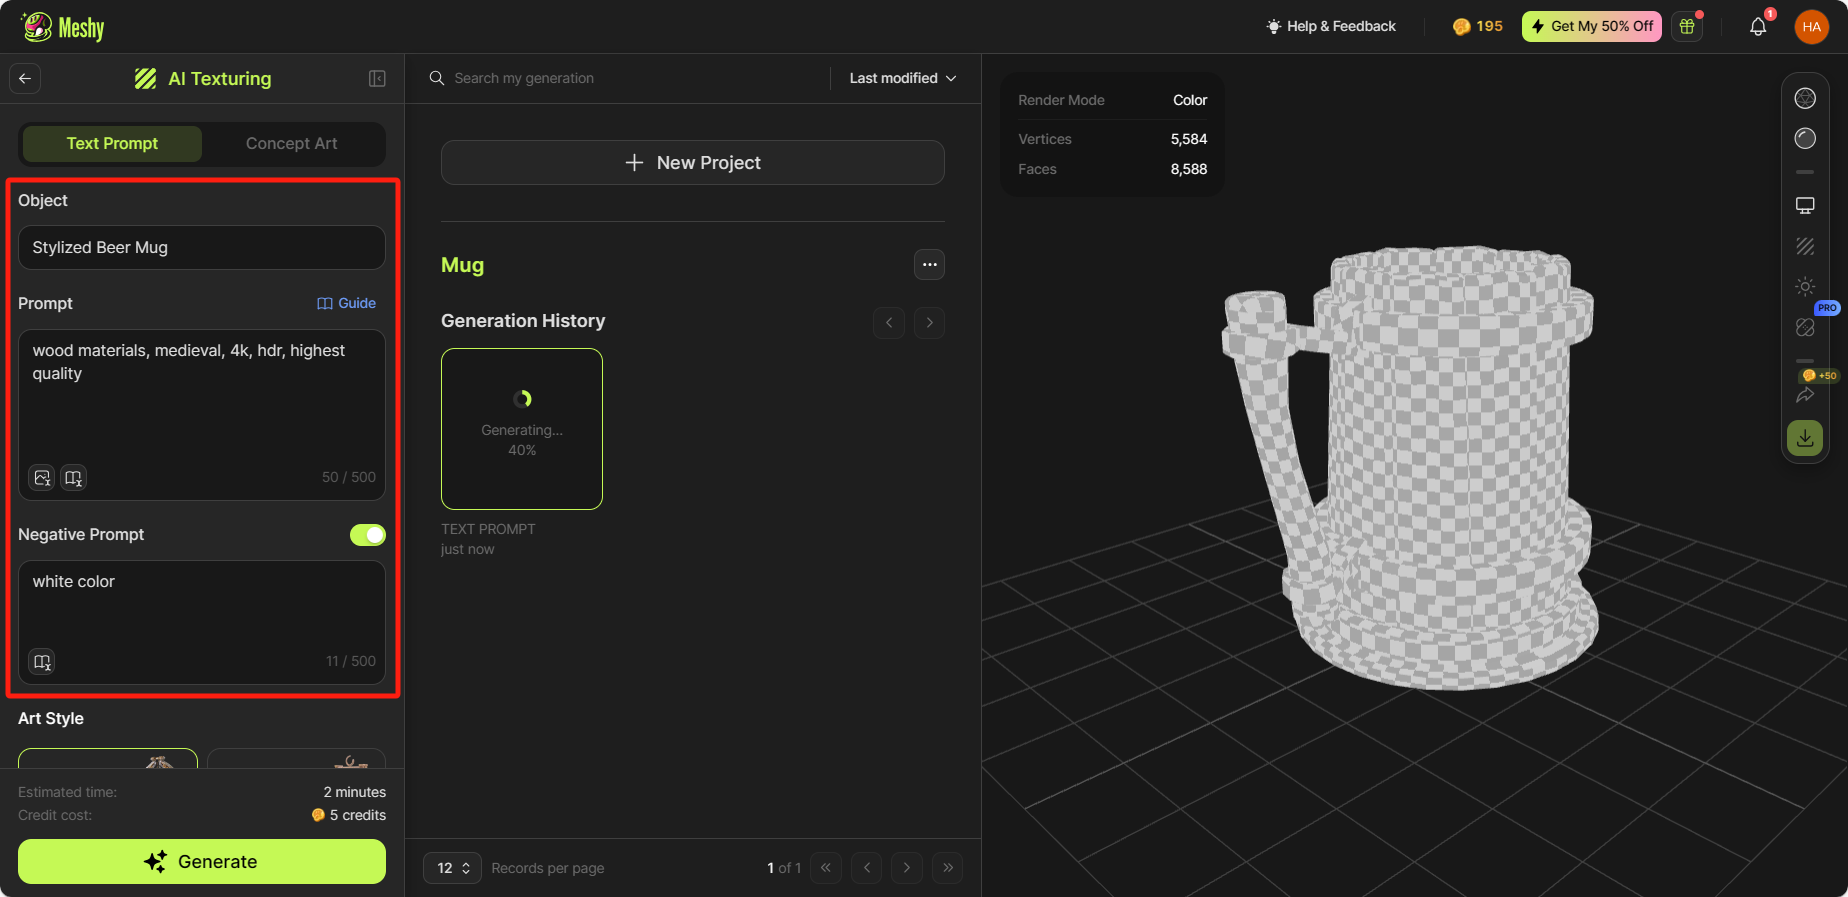
Image to Texture
Meshy AI texturing tool also allows artists to choose 2D concept art as input. By uploading concept art with multiple views, our AI automatically applies texture to the original model.
To use images as input, please switch the generation mode to “Concept Art” and then upload images.
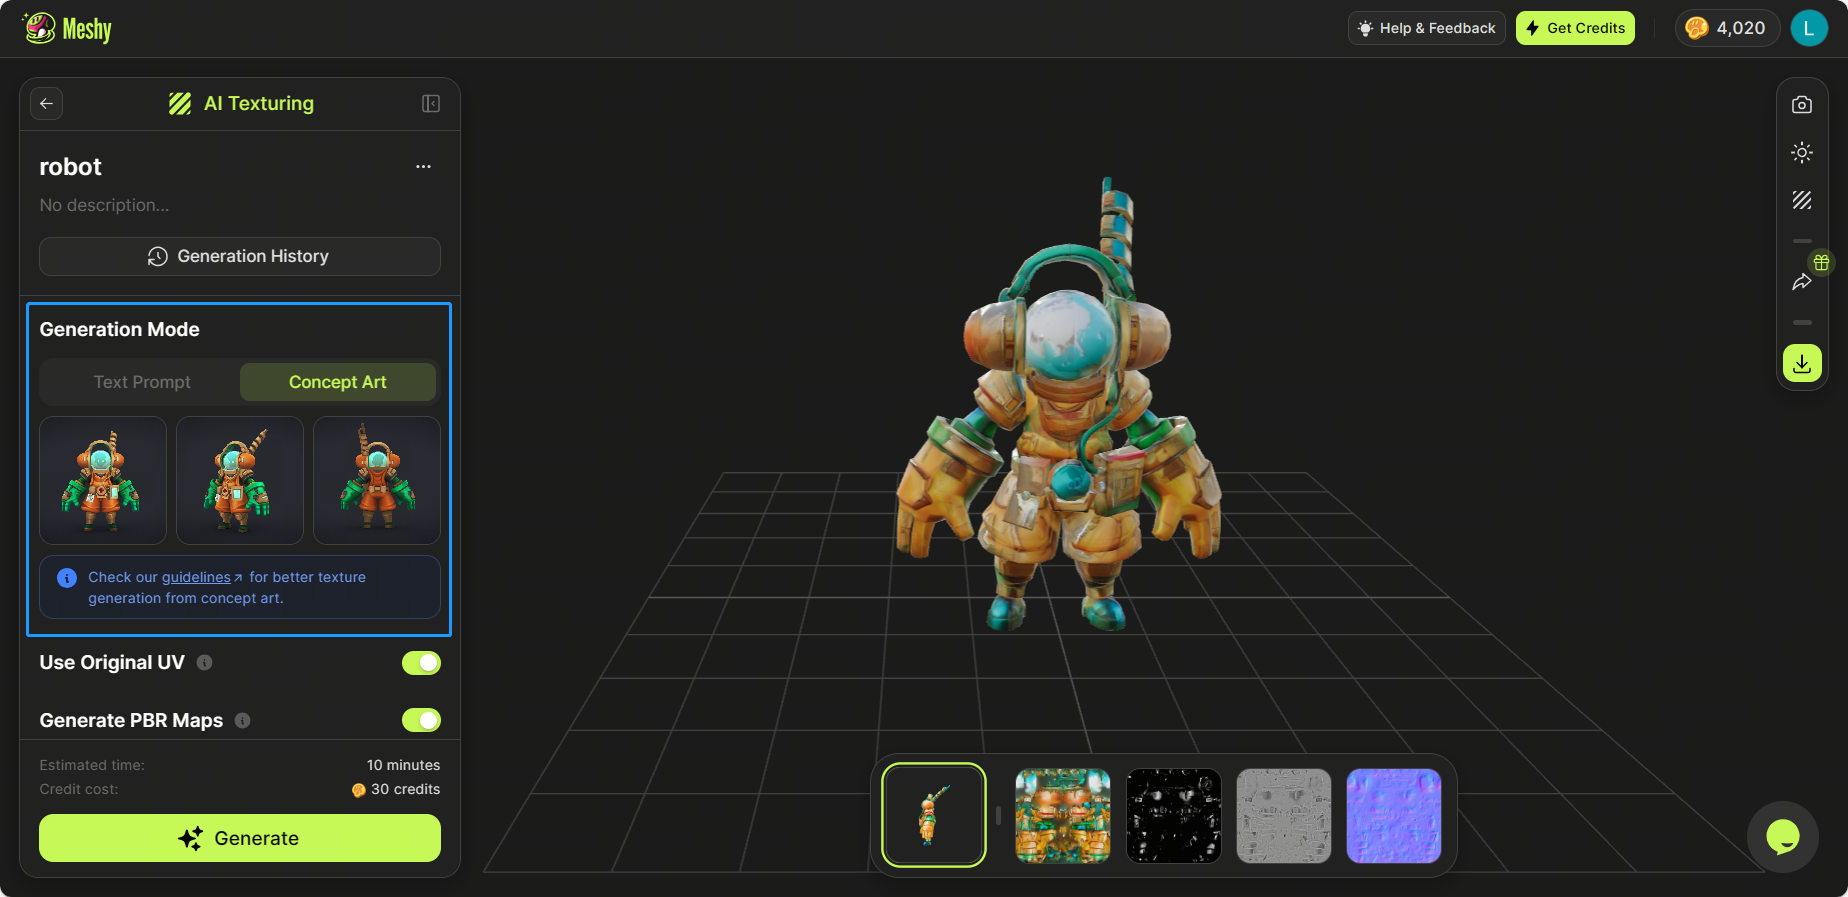
Image Input Guidelines
To optimize the generated results, we have provided some guidelines regarding the types of images that are preferred for processing.
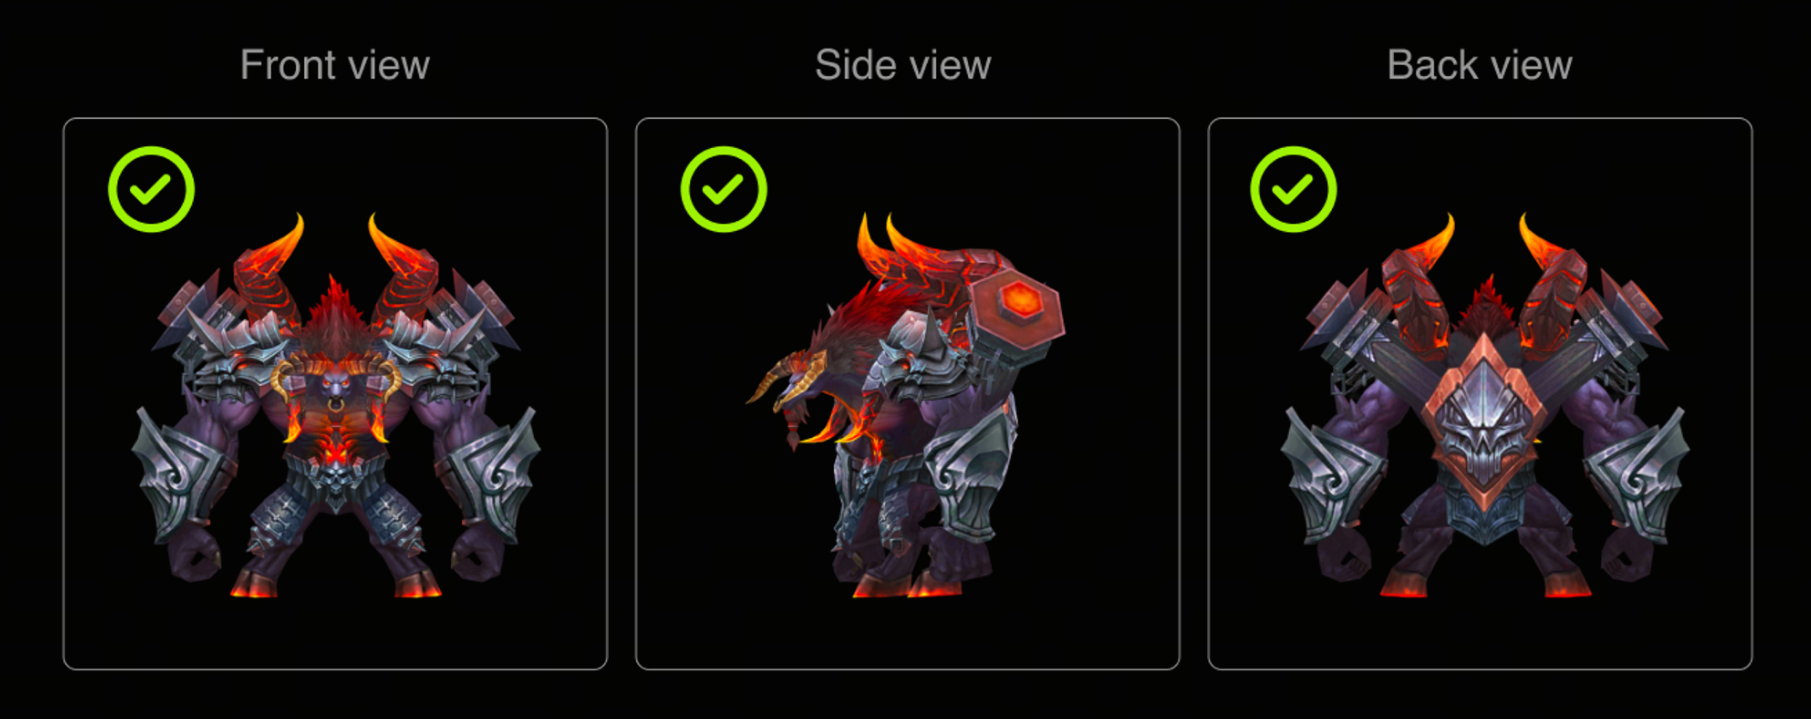
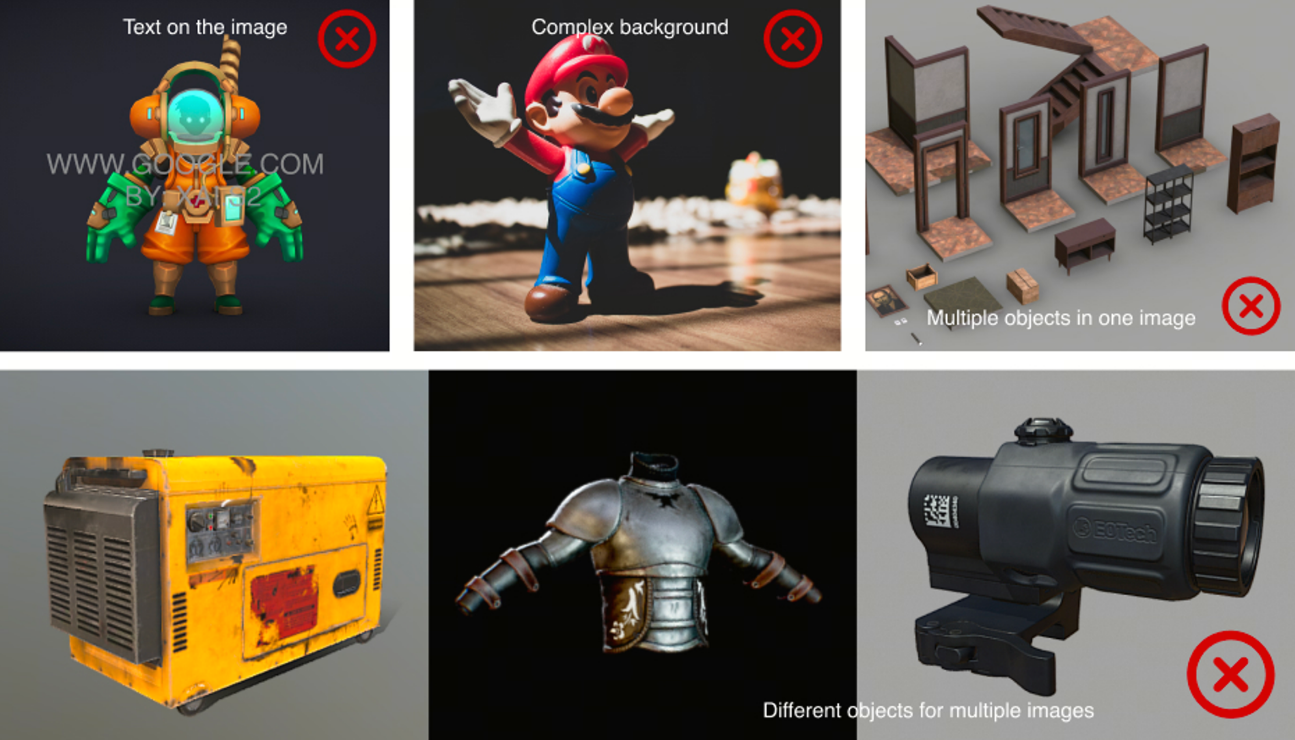
It is recommended to use standardized orthographic views of the model you're going to texture as input images, with white backgrounds and no text or extraneous information.
Recommended Inputs
✅ Single object in one image
✅ Same object for multiple images
✅ White/monochrome/no background
Not Recommended Inputs
❌ Text on the image
❌ Multiple objects in one image
❌ Different objects for multiple images
❌ Complex background
Choose Other Parameters
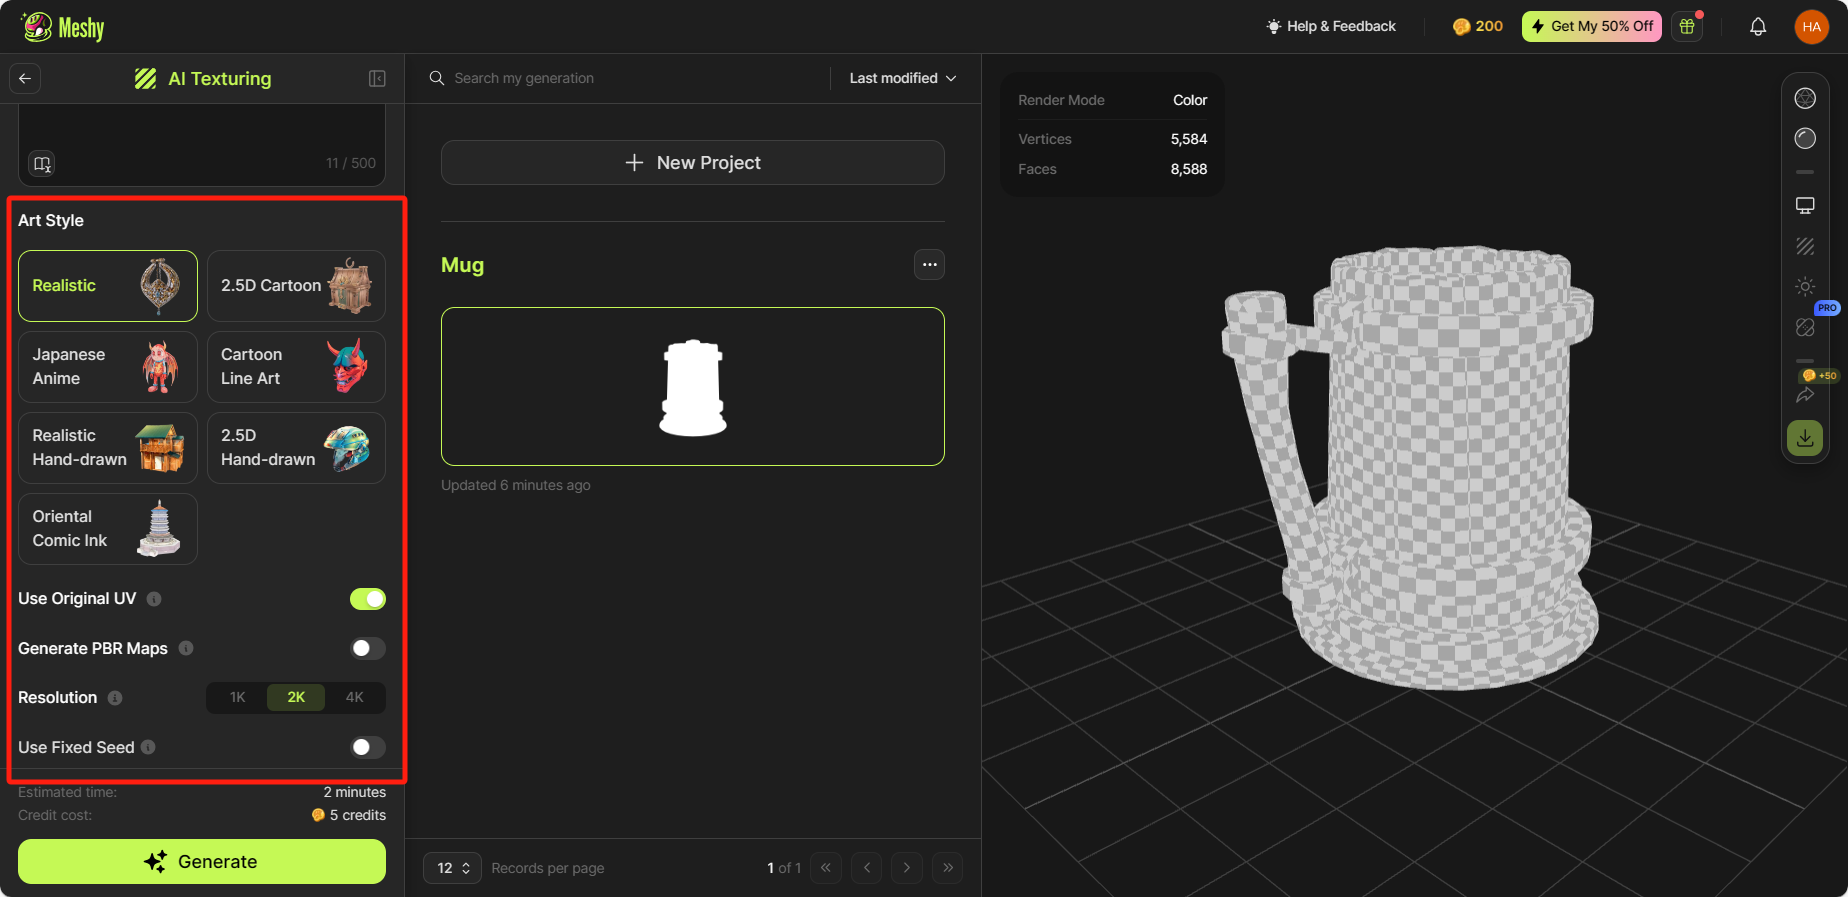
Art Style
Meshy provides users with a wide range of popular artistic styles, such as Realistic, Japanese Anime, Cartoon, Hand-Drawn, and more. Enjoy generating the artistic style you want for your model!
Use Original UV
This means whether to use the UV of the original model. When enabled, it means using the UV that comes with the original model. When disabled, it means using the UV generated by our AI. It is highly recommended to use the UV of the original model as the UV generated by AI may not yield the best result.
Generate PBR Maps
This determines whether to generate PBR maps. When enabled, it generates PBR maps including base color, metallic, roughness, and normal maps. When disabled, it only generates a color map.
Resolution
The texture resolution of the generated model. Meshy now supports 1K, 2K, and 4K resolutions.
Use Fixed Seed
Seed is an integer between 1 and 2147483648. When you use the same prompt and seed, you will generate the same result.
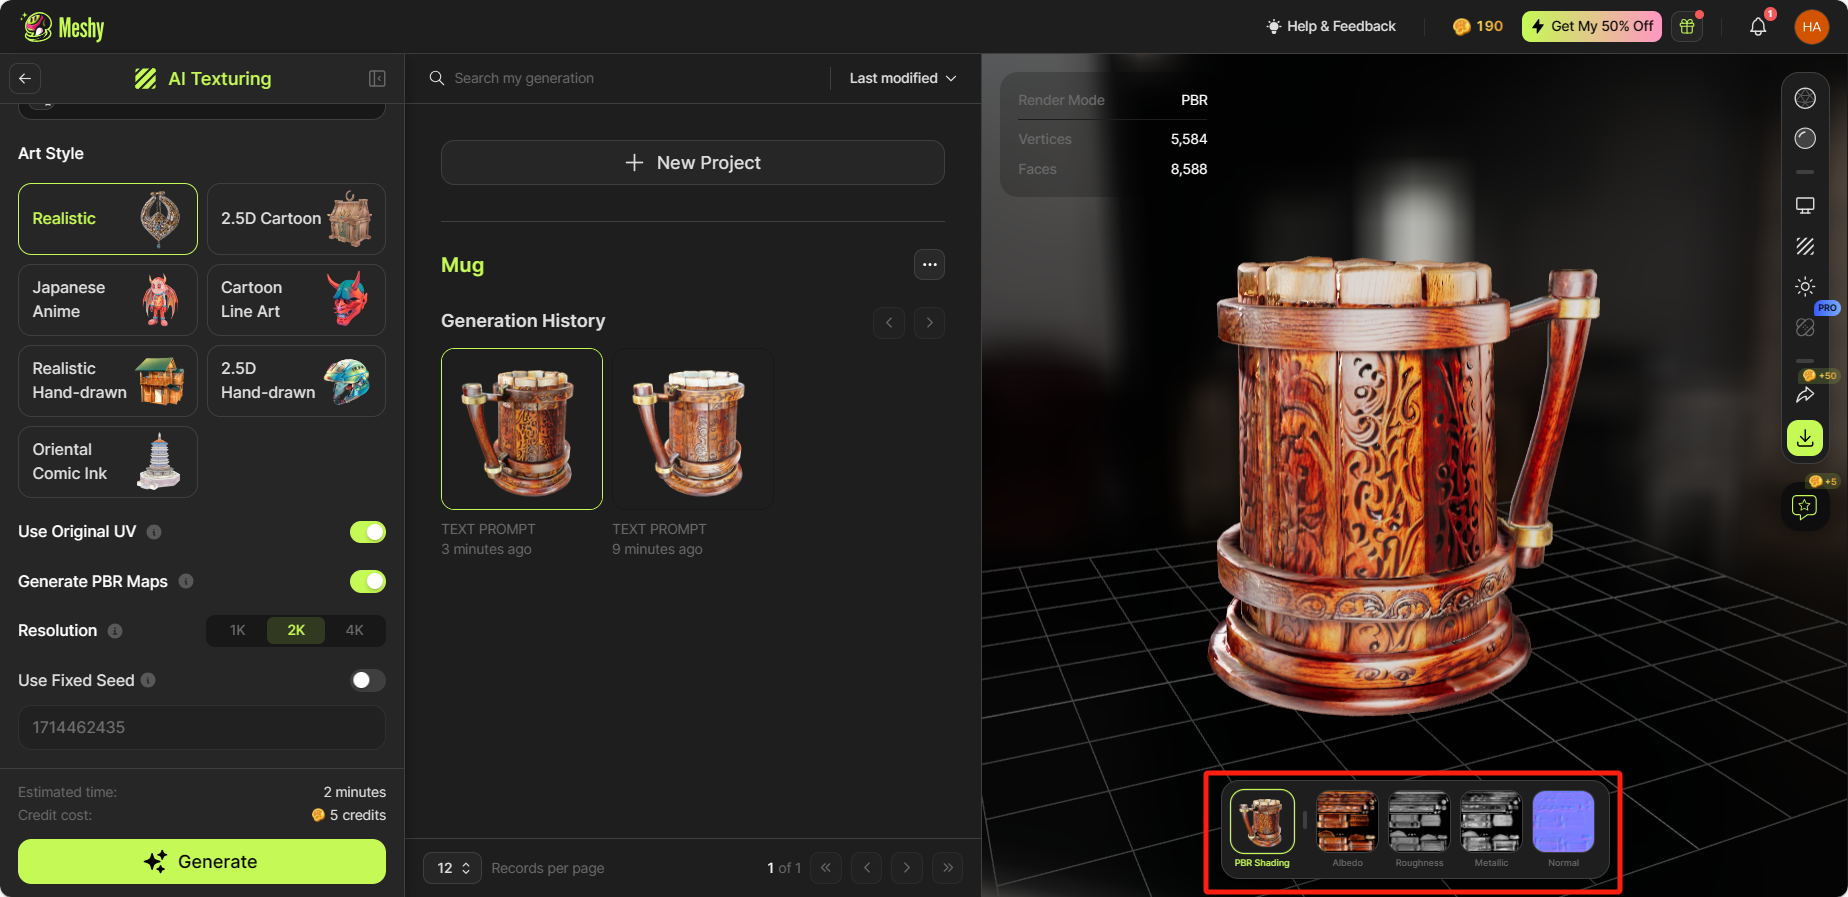
Explore the Generated Model
After the generation is completed, you'll find a panel at the bottom of the screen where you can switch tabs to view the 3D model and the generated maps.
In the 3D view, you'll see a preview settings panel on the right side. From here, you can tweak different settings to personalize your 3D view. If you switch to PBR shading, you can click on 'Environment Settings' to adjust the HDRI strength and rotation. You can also use 'Texture Settings' to fine-tune the metallic and roughness of the texture.
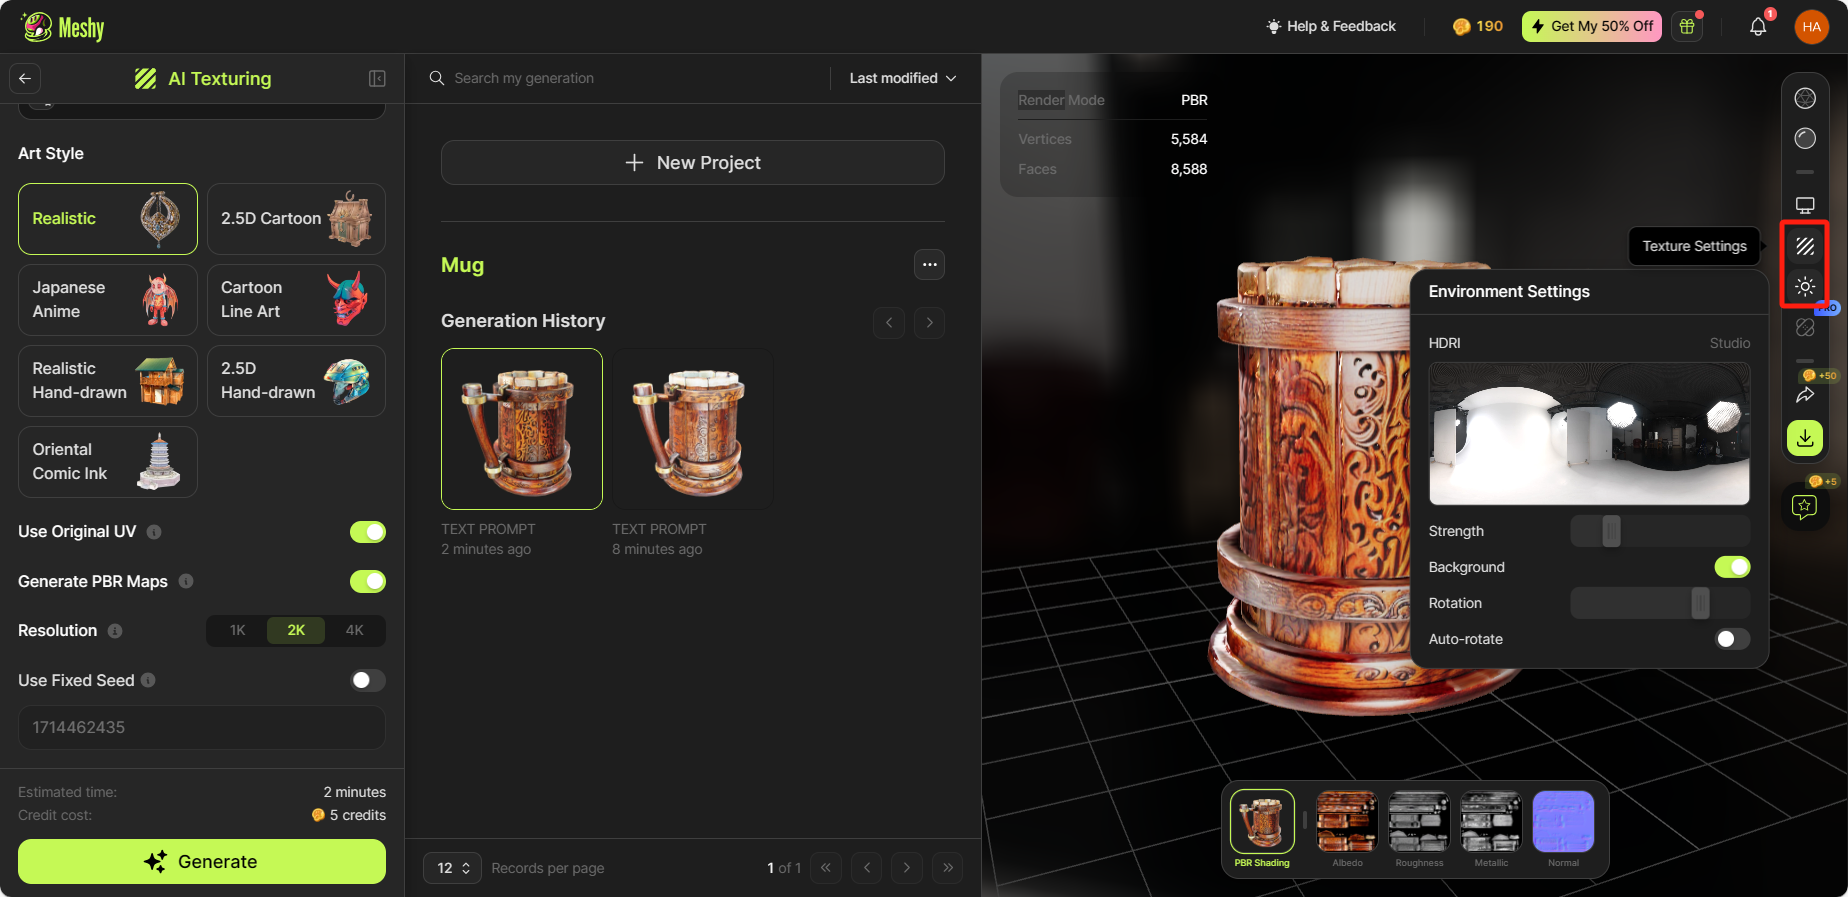
Please note that adjusting these parameters won't alter the properties of the model and textures themselves. They are solely meant to provide different preview options.
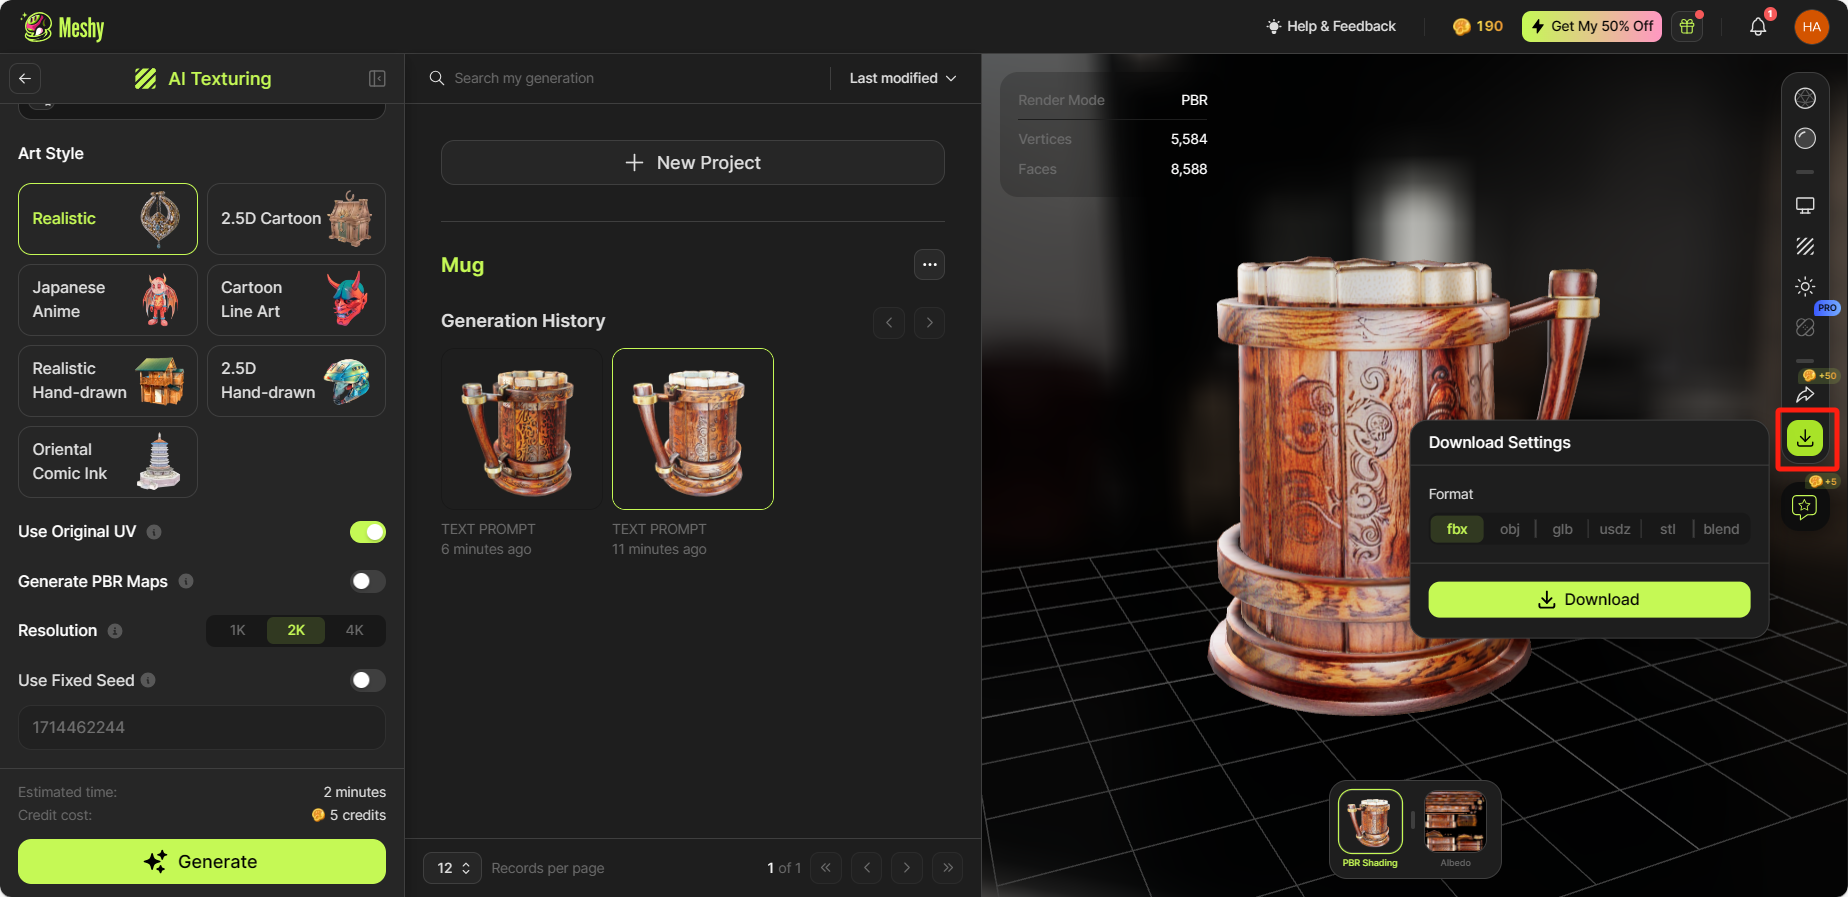
Download Your Assets
To download your assets, simply click on the ‘Download’ button on the right toolbar. we support downloading models in .fbx / .obj / .usdz / .glb / .stl / .blend formats.
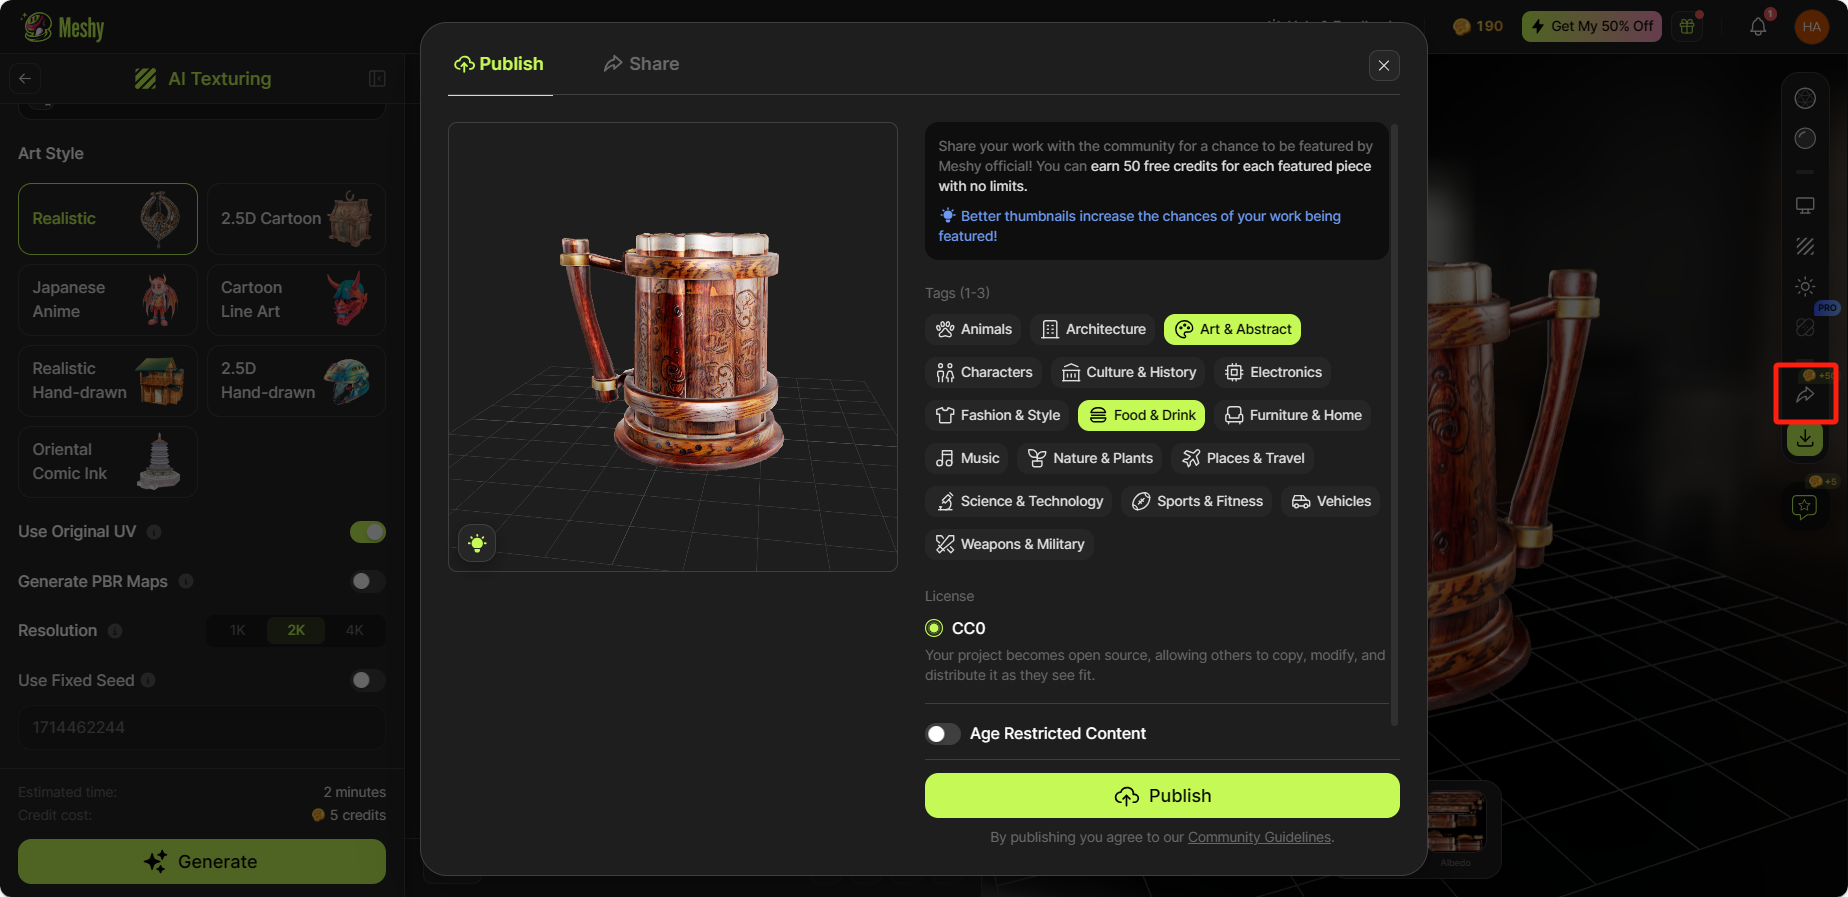
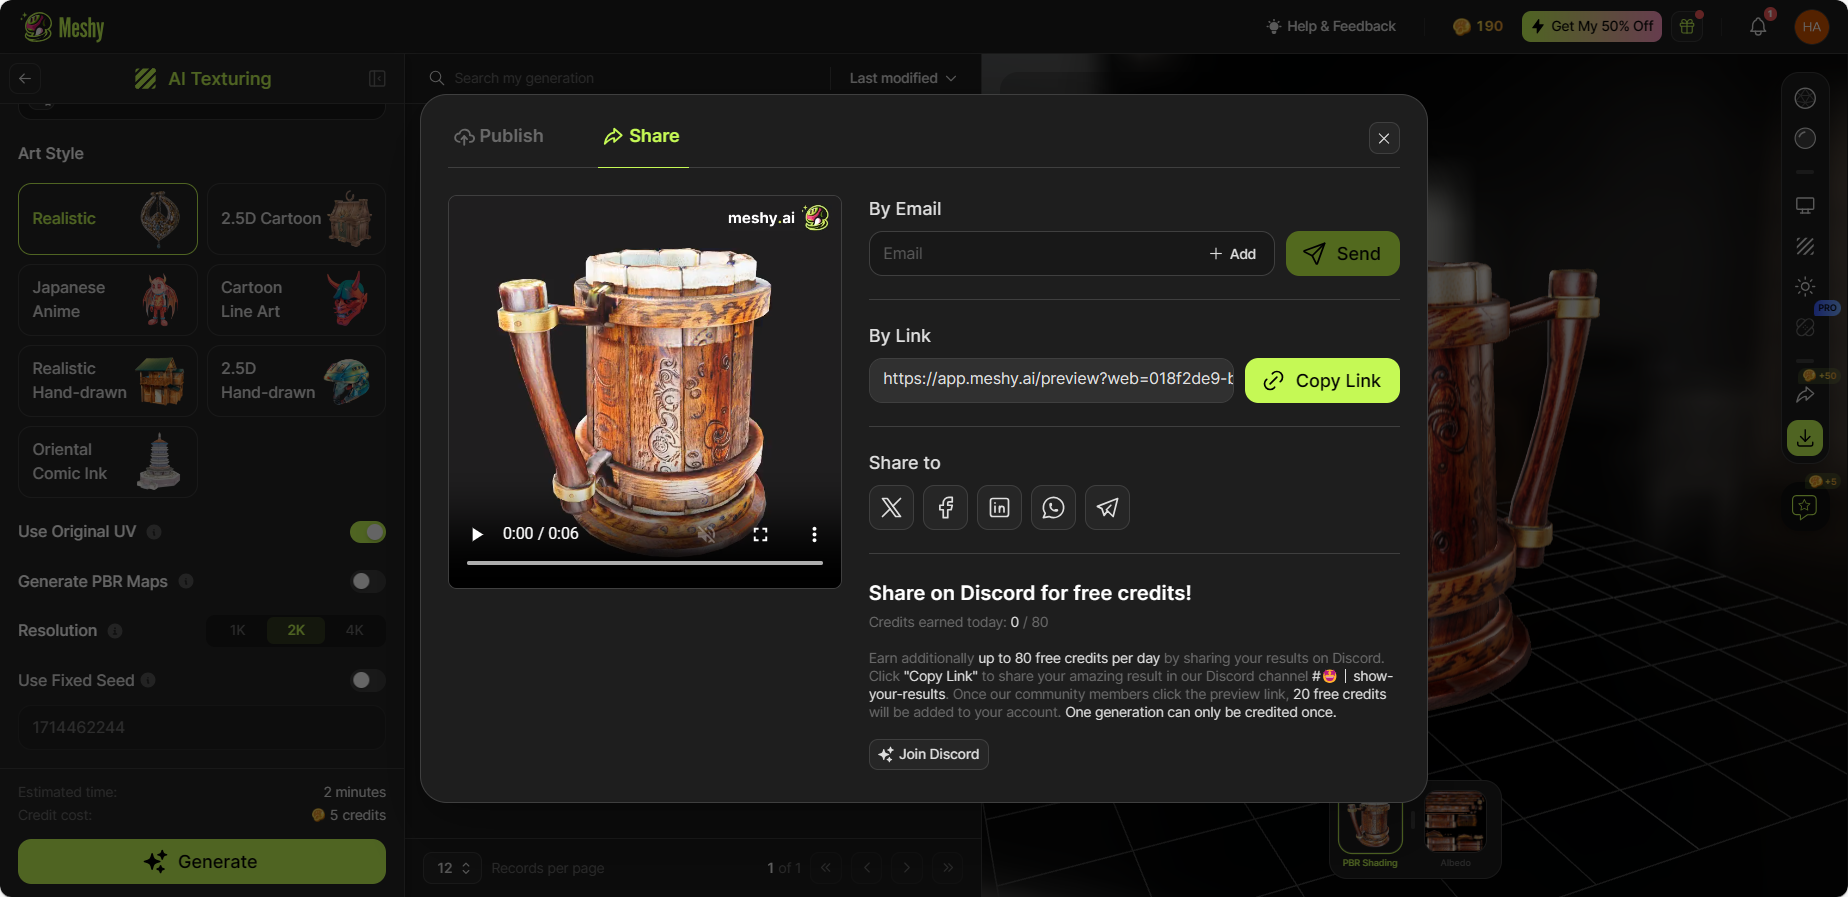
Share Your Creations
If you want to share your artwork with the community or your friends, simply click the 'Share' button on the right toolbar. From there, you can publish your model to the Meshy community, share it via email or social media, copy a model preview link, or download a video preview of your creation.